[metaslider id=12]

By

DIY Conical Build Pt 1 The Materials

The foundation material for the conical needs to be stainless steel in order to keep the vessel from rusting.  Now for grade of stainless – something like 304 or 18/8 which is used for stainless pots and buckets should be just fine and is fairly common.  With that determined what options exist for us to get that material at reasonable cost.  Well, free is obviously best, but since I used up much of my pile of salvaged stainless steel sheets (mainly BBQs) building the wood fired pizza oven I don’t have much of that left.

Then there’s the buy option, and actually as I am going forward I find myself buying some stainless material for the legs – but now that I consider it I could have gotten away without making that purchase, but more on that once we get to that stage of the build…

Materials with which to build the DIY Conical

Materials with which to build the DIY Conical

Anyway back to the fundamental parts of the conical – the vertical segment and the cone.  Well since the top is basically like a pot without a base I thought I might as well go that route and build it out of stainless steel pots which are readily available and low cost.  As an added bonus the top segment is already nicely rolled and sealed.

Now some folks I’ve seen building conicals use a cone made from spun stainless funnels – but since I couldn’t find one easily and at low cost I figured I would just form one up from some more stainless steel sheet (or pot bits).  It’s more welding but I kinda want the practice to improve my skills so really not all that bad.  Plus as indicated before – by brewing in the conical with the associated 90 minute boil I would be able to achieve excellent sanitation even where weld imperfections might otherwise thwart chemical cleaning.

Now for the disadvantages… well these pots are pretty thin – definitely thick enough to do the job without problem but thinner material is often more difficult to weld effectively. Still cost and availability prompted me to consider this my best option – especially since I was reasonably sure that I would be able to handle the welding of the think stainless with the Henrob OA torch based on my experience with the stainless pizza oven.

The price – well a pot set from Harbor Freight where the largest pot is 4 gallons cost me $20 and and a 5 gallon pot at the local homestore cost me another $20.  Now some folks I’ve seen building conicals use a cone made from spun stainless funnels – but since

Now for the cool part right – the triclamp fittings that make the conical so versatile.  Well, these are available at low cost off ebay or amazon from manufacturers in China.  How low cost is low cost?  Well a 1.5″ weld-on tricalmp fitting runs $1.99 with free shipping!  So I purchased a bunch of 1.5″ fittings, gaskets, caps, threaded fittings, valves and the like along with a few 2″ fittings to allow me to pass the electrical heating element into the conical.

Total cost for the bits and bobs… slightly over a hundred bucks.  Not bad for a prototype.


By

DIY Conical Fermenter and Brewing System on the cheap

I’ve been brewing beer at home for quite some time – since before I could legally drink what I was producing.  Much of that has been from kits or from malt extract and my homegrown hops in large part because of the ease with which that can be accomplished.  When I’ve gone over to the all grain side it’s been with cobbled together motley collection of coolers, strainers, bags and the like – which all things considered has gone pretty well.

Recently I’ve wanted to increase my all grain brewing in part because it offers more control but truth be told because it also promises to be significantly cheaper since malt extract and kits are now getting to the price point they produce beer for half the price of purchased product.

DIY Conical Fermenter and Brewing system beside a 3 gallon keg

DIY Conical Fermenter and Brewing system half completed beside a 3 gallon keg

In my review of the systems that are out there I’ve been drawn to the one vessel systems – either the brew-in-a-bag systems, or the brew in a single vessel like the braumeister out of Germany or the more recently introduced grainfather – which really resembles a large commercial coffee urn.  But the one that really caught my fancy was the system that has you brewing in a single vessel that vessel being a conical – now that is efficiency!

I’ve wanted a conical for some time now, and since I’ve started to get a hang of welding stainless steel with my Henrob oxy-acetylene torch when I built the stainless steel pizza oven I wanted to give it a try – but since my welding isn’t exactly commercial grade the idea of doing a 90 minute boil in the conical – which would sterilize the nooks and crannies left in my imperfect welds that might be otherwise hard to get clean – efficient and able to accommodate my stainless welding limitations.

Because I didn’t want to invest too much money into the project I decided to start with a few cheap stainless steel pots – a four pot set from harbor freight, the largest one a 4 gallon unit, and an additional 5 gallon pot.  Both the set and the larger pot were nineteen bucks each.  Tri-clamp fittings from e-bay, direct from China added another $40 or so, toss on a pound of stainless tig rods and we’re looking at about a hundred bucks.

Now, I’m frugal, but one of the other factors here is that this is a prototype, and as such it won’t be perfect, so it doesn’t make sense to dump a lot of cash into something that inherently will be less than the optimal design.

The other thing is that this won’t handle a full five gallon batch – but it should be sized right for three gallon batches, which if this system is as easy to use as I would like to make it is about the perfect size for turning out loads of different beer variations.

Oh, and I’ve got a twist up my sleeve that I’m going to explore, but I’ll save that for later.  Stay tuned to see how it works out.

By

Meat Grinders – Meat Money Maker

Owning a meat grinder is a great way to save money on your food bill – which let’s face it isn’t likely falling.  In fact, there’s a good chance you can pay for the addition of the grinder to your household the first time you use it – and that is a pretty incredible payback.

#32 hand cranked meat grinder - simplicity and durability

#32 hand cranked meat grinder – simplicity and durability

You’ll often see bigger cuts of meat, beef and pork roasts and whole turkeys selling on special for a fraction of what ground meat costs.  While you could make a paying proposition of simply grinding up these cuts instead of buying ground meat there is an even more lucrative possibility.  I like to cut up roasts into thick steaks and chops and then trim off the parts that will be extra fatty or gristly – you know the parts that would otherwise end up being left on the plate.   I wrap the steaks or chops in a good butcher paper and toss the trimmings in ziplock bags and everything goes in one of my freezers.  Then once a year I’ll grind and process all of the accumulated trimmings.

When it comes to the turkeys, which can be offered up at crazy low prices to induce Thanksgiving and Christmas shoppers to visit one retailer or another I trim the breasts off first and wrap those to use in place of chicken breasts.  Then once the breasts are off I like to cut off the easy to remove meat for grinding, and then toss the carcass(s) into a big pot with a bit of water and boil them down.  I like to use a reciprocating saw to cut the turkey skeletons up so that I can cram more into one pot.  Once the carcasses have been cooked cool them down and then strip the remaining meat off of the carcass and then pressure can the meat and broth for cooking and easy hearty soups.  I usually freeze the cooled fat rather than can it and then add it after.

#12 Electric Meat Grinder

#12 Electric Meat Grinder

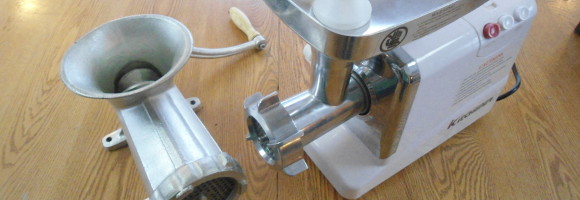
So a meat grinder makes a great fit into an active home kitchen – given this what are some realistic options.  Well the lowest cost entry point is a tinned cast iron hand cranked grinder, they are a bulletproof design, and are very affordable.  I’ve had one of the smaller ones – a #10 (about $30) and it did a good job, but while it is bulletproof and easy to crank it is limited in terms of throughput.  One advantage is that it can be clamped on a counter – as long as your counter isn’t something that mars easily.  I found this grinder too small for my purposes – but then I tend to do big batches in a single go.

I now have the largest of the hand cranked cast iron grinder, a #32 – which costs about $40. It requires a solid mounting to a working surface – usually by bolting them down, so it probably isn’t something you are going to be affixing to your kitchen counter.  I generally bolt it to the surface of a workmate portable workbench which I then need to hold down with some of my weight applied with one of my feet while cranking.  It does a great job but certainly does give a good workout.  If you are smaller you might want to opt for the medium size #22 which like the #32 needs to be bolted to a work surface.

There are #32 grinders which come with big pulleys in addition to the crank.  If you’ve got a bit of space this might be a good option – bolting the grinder and a big electric motor (a Harbor Freight farm or compressor duty motor would be my choice) to a solid work surface.  This would combine the last a lifetime or two design of the cast iron mill, the capacity of the #32 and the advantages of electric grinding with hand crank back up.  But you’ve got to have the space to store a setup of this size.

#32 meat grinder left and #12 grinder right with the plates in front showing size difference

#32 meat grinder left and #12 grinder right with the plates in front showing size difference

On the electric grinder front, I’ve got a #12 Kitchener brand grinder which features a 400 watt motor. This is a pretty good home size grinder – I’ve done a lot of grinding on it, but it definitely isn’t a professional or industrial model.  The construction is solid, but you can hear the motor laboring at points and it needs to be shut off an cooled periodically to avoid overheating.   Now, it’s priced right – this brand and similar models run about $70, they have a pretty good throughput rate, and it doesn’t require any mounting to counters or work surfaces, but while I’ve been using it for about three years now I’d be surprised if it end up being handed down to my kids.  I know my #32 hand cranked unit will be still going strong for my great grand kids.

I’ve also seen small grinders that are mostly plastic and use suction mounting to attach them to a counter.  I haven’t used one of these, but even the #10 sized mill needs to be solidly attached to the end of a counter with the pretty strong built in clamp.  Since I have used apple grinders that feature the same suction mounting and had them move around I can’t believe these will do anything more than waste your $25 and frustrate you – if you are looking for something on the smaller size go for a #10 cast iron mill, or one of the electrical ones.

What about one of the mill attachments for your stand mixer?  Since they are similarly sized to the electric grinder I have my reasoned guess would be that they would be pretty good buy you’d have to watch the motor and ensure that you shut things off and let it cool unless you really do have a heavy duty mixer.

In terms of incorporating these into you food strategy, I usually spend part of a day or two once a year grinding the meat trimmings I’ve accumulated in the freezer from cutting up beef, pork and venison and making them into burgers and fresh and cured sausages.  Another day gets spent grinding up those discount turkeys and then canning cases of stock that result.

Check out the price of these meat products in your grocery or butcher shop and it should be clear that this is a strategy that can not only add capacity to your home but save loads of money.

By

Vacuum Food Bottle Showdown – Stanley vs. Thermos

Vacuum Bottle Tops and Lids

Vacuum Bottle Tops and Lids

I feel like you should be reading this and thinking monster truck announcer voice for this epic showdown between the two leading brands in vacuum bottle technology battling it out to see which is the champion of the lunch box!  The reality is slightly less epic.

My guess is that for many folks the value of a vacuum food bottle has diminished as microwaves have become pervasive in many workpalce kitchens.  But that isn’t the case for all workplaces, nor is it true for many kids – including mine.

For them especially this is relevant because food restrictions due to allergies can really cut down on what you can put in a kid’s lunch box – no nuts or nut butters is pretty standard, but last year there was even a prohibition against bringing fish to school because someone had an allergy or at least one that was close enough that the administration didn’t want to trouble themselves with deciding what was in or out.

In anycase, a vacuum bottle allows you to pack a warm lunch that can not only diversify the regular fare, but at least in my home is a very economical means of packing lunch.  We’re talking here things like leftover butter chicken, Thai curries, and hearty soups with a chunk of homemade bread or a wholesome whole wheat biscuit.

Vacuum Bottle Heat Loss Chart

Vacuum Bottle Heat Loss Chart

All those things do best nice and warm, and I’ve found that cheap vacuum bottle just don’t cut it given I reheat lunches shortly after 6am.  So this fall  when shopping for a few quality vacuum bottles I found those made by – Stanley and Thermos brands came with a variety of competing claims on how long they would keep contents warm or cold.  With them priced reasonably closely I decided to pick up a few and trial them to see which ended up being better.

Well, the end result is that all claims aside they all perform equally well and seem to loose heat at comparable rates – the biggest determining factor being the starting volume of the contents you load rather than which brand or model you choose as can be seen in the chart.

So knowing that which ones win out.  Well, for adults I like the 17oz Stanley – it’s a nice size and had the much better designed top.  Thermos tops should really be redesigned to give better grip.  As the contents cool there can be a pretty substantial vacuum pulled which fights against easy opening of the top.  But all things considered for the kids the 16oz Thermos brand ones win – particularly based on size to volume.  They are a nice meal size for kids and they are only 2/3rds the size of the Stanley which makes a difference in a jammed backpack.   The folding spoon originally struck me as gimicky, and likely to get lost in short order – but somewhat surprisingly we’re about five month into their frequent use by the kids – at least once a week – and those spoons are still around.

Slightly more worrying is the silicon gasket.  I worry every time I wash them that the gasket will go missing – but so far so good.  I will probably end up contacting Stanley and Thermos and asking to order a few replacement gaskets to have in the spare parts drawer.  Apart from that I can see both of these living up to their claims of a lifetime of use, and both have already paid their cost back in lunch savings (roughly $25 to $30).

These definitely trump the cheap thermoses that will end up disappointing and being chucked time and again.  Buy something that will deliver and keep you happy.

By

Corn Grain Mill Review

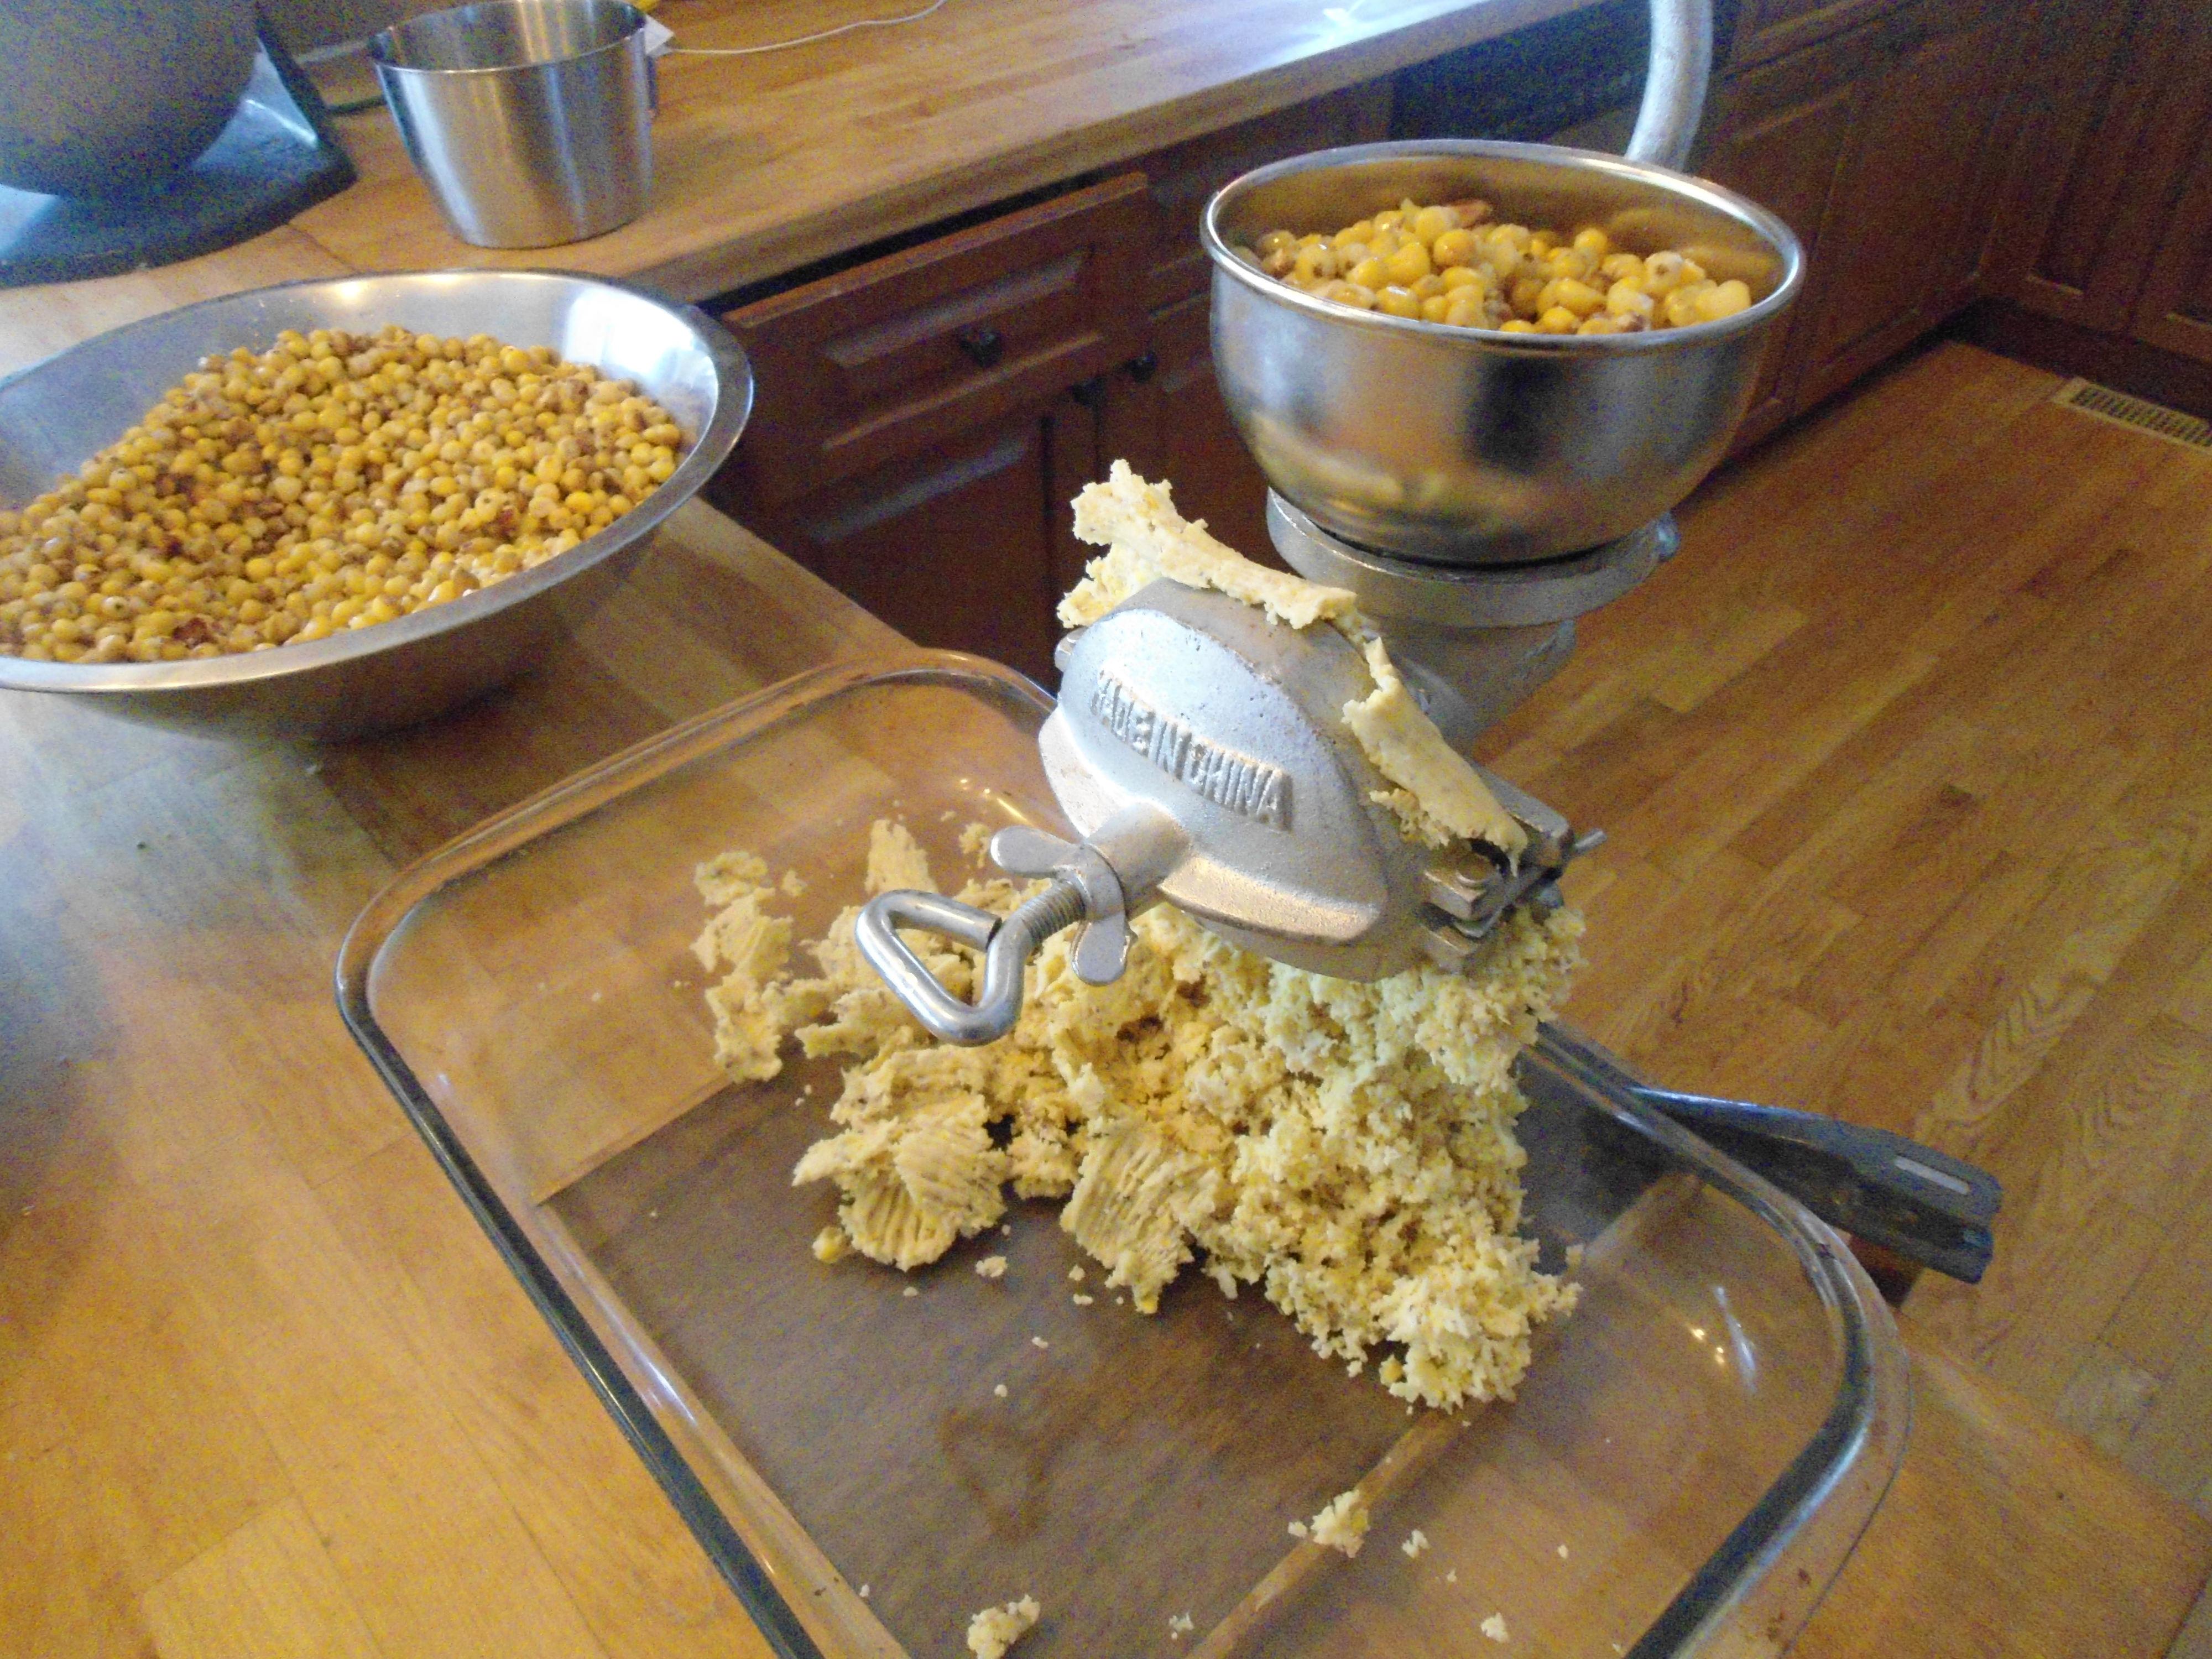
Cheap Corn Mills - great for nixtamatal

Cheap Corn Mills – great for nixtamatal

These mills are cheap (like $25) and readily available, but are they any good?  Definitely, and you probably should pick one up.  But, like so many things you need to understand what they are good for.

Now, what they are great for is making nixtamatal – that is grain corn processed with alkali for making things like tortillas.  It’s an easy grind material which is the perfect fit for this machine – and fresh nixtamatal is awesome!

It’s also OK cracking grain for animal feed or malted barley for brewing beer.  Now, what it isn’t perfect in that latter role – a roller mill would be better – but hey for $25 it’s a pretty affordable malt crusher.

So what doesn’t it do well?  Now, that’s grind grains for flour.  That is why I first picked up this mill a couple of decades ago – and the poor results and high cost of mills capable of producing fine flour prompted me to start on the path that resulted in the Homestead Grain Mill that is simple to build for yourself at low cost and produces great flour.

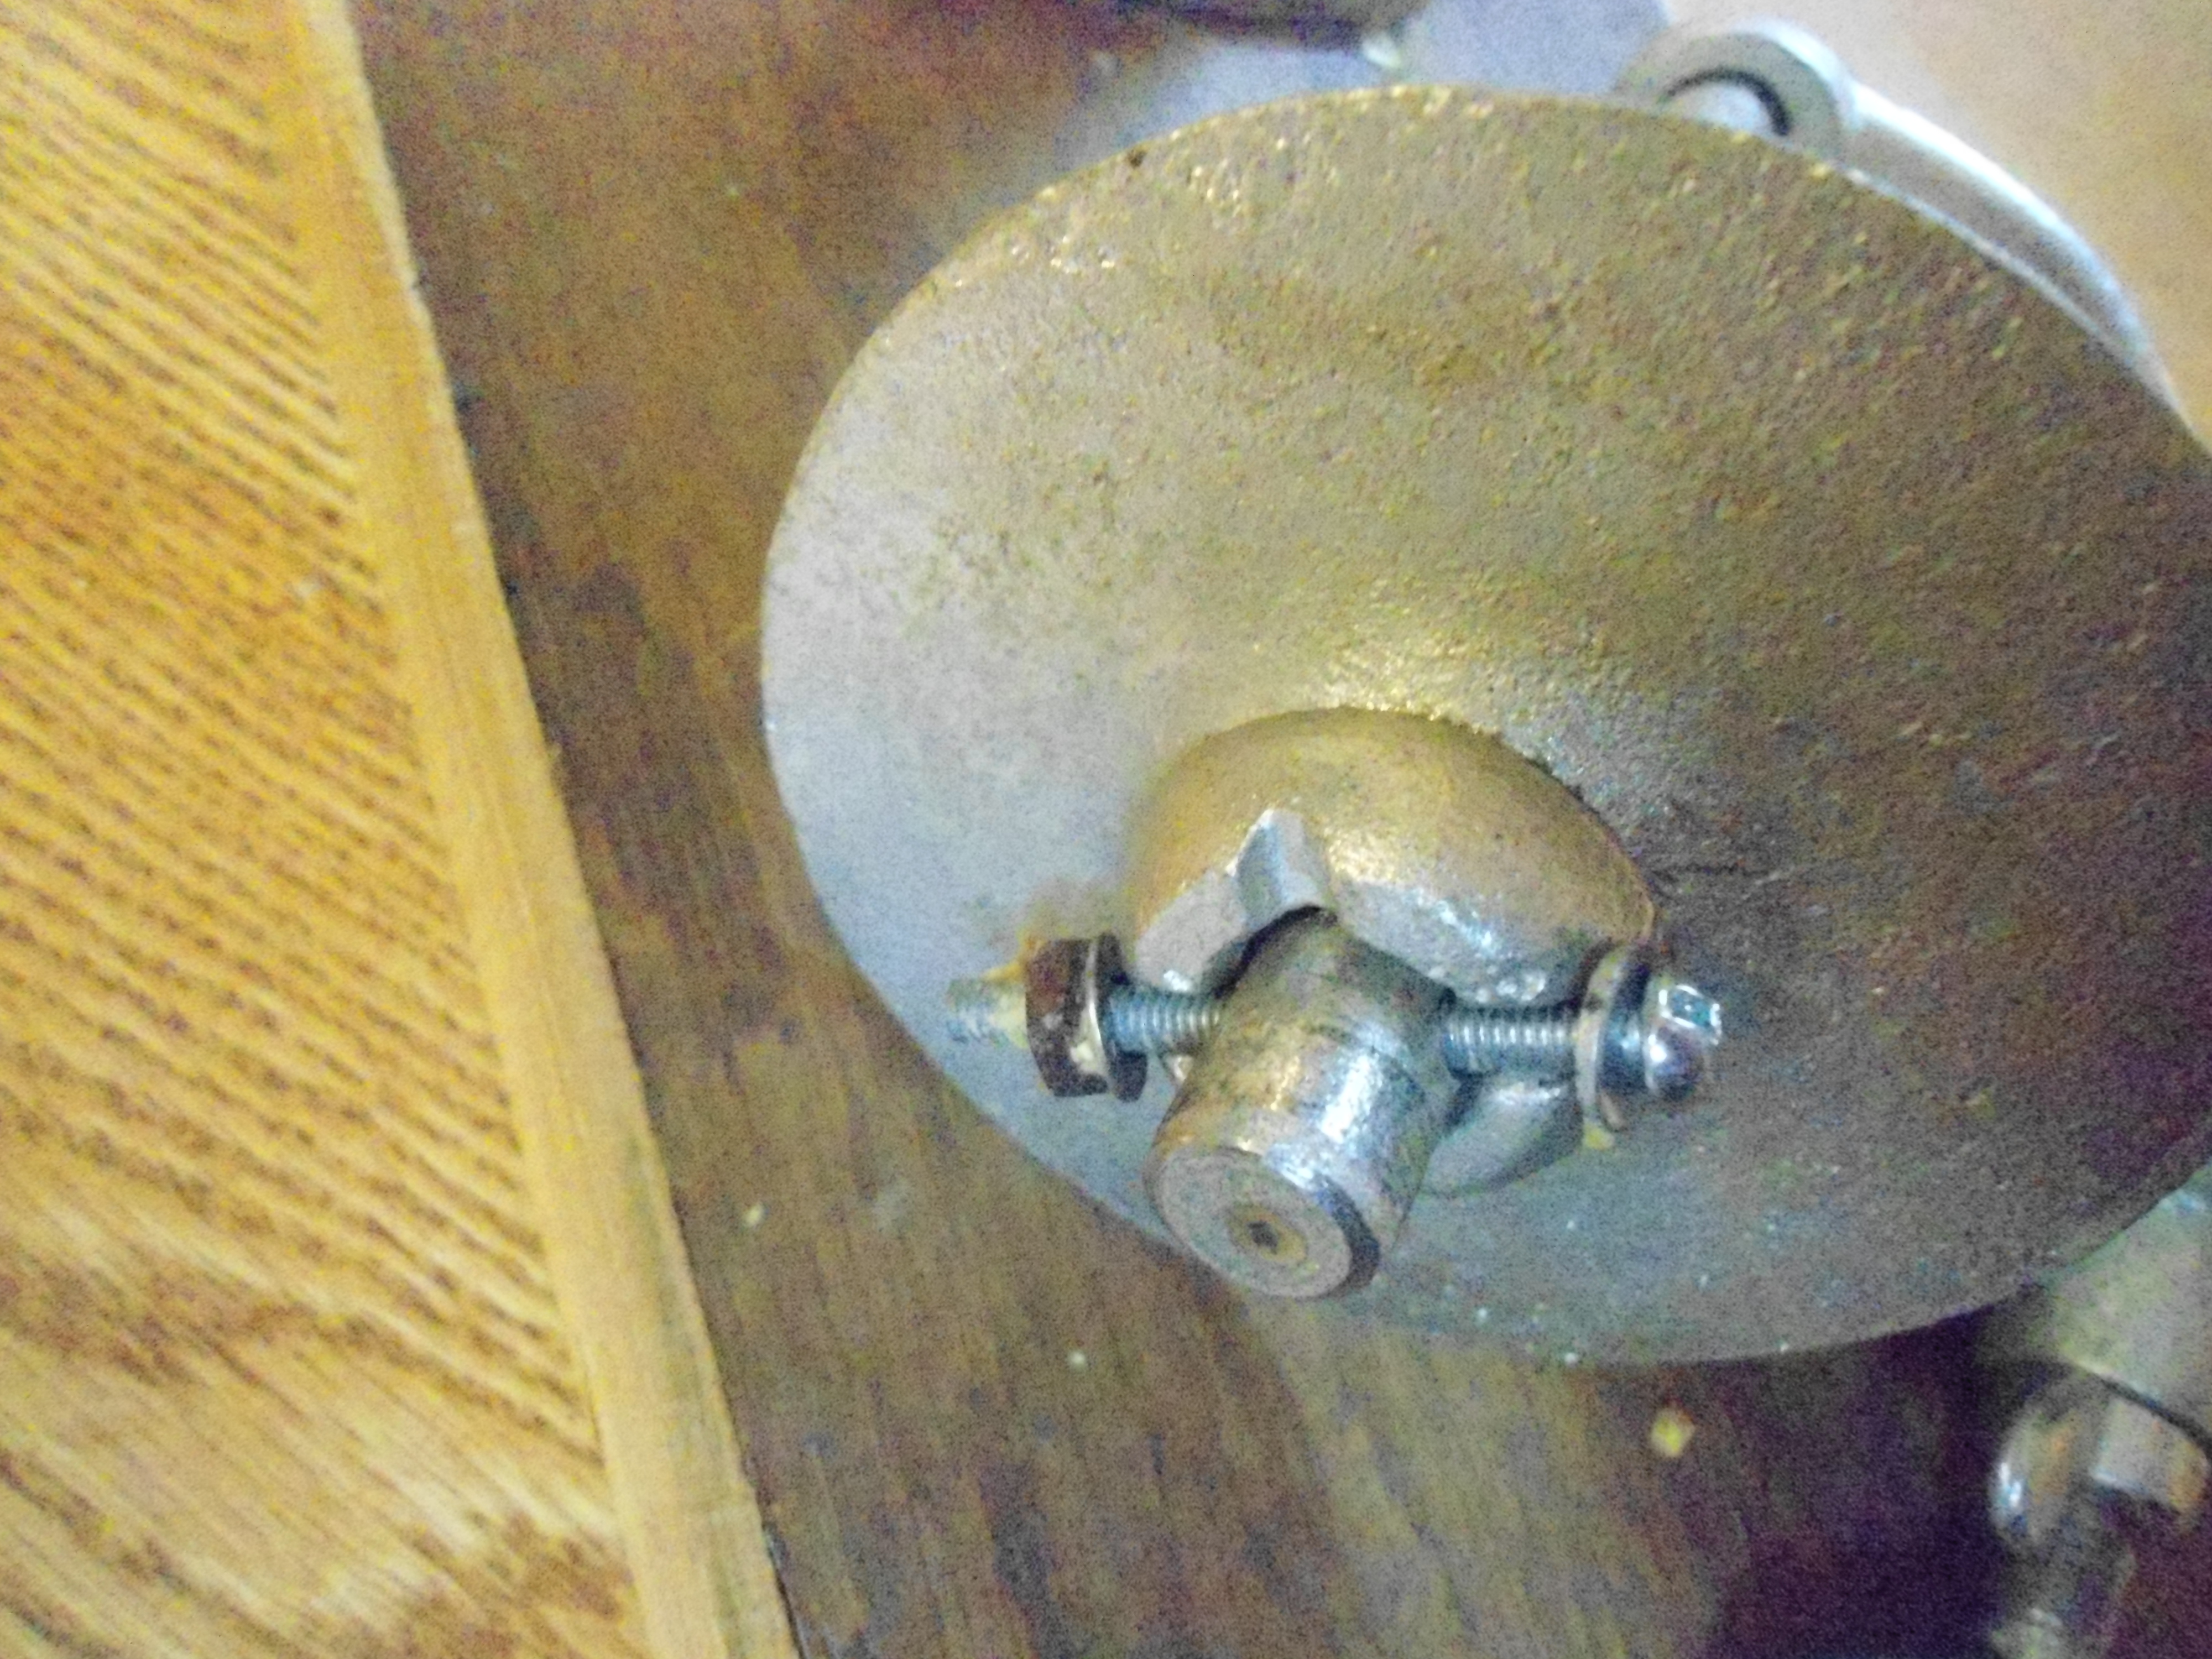
Replace the cotter pin holding the rotating burr in place with a bolt (in this case a #8)

Replace the cotter pin holding the rotating burr in place with a bolt (in this case a #8)

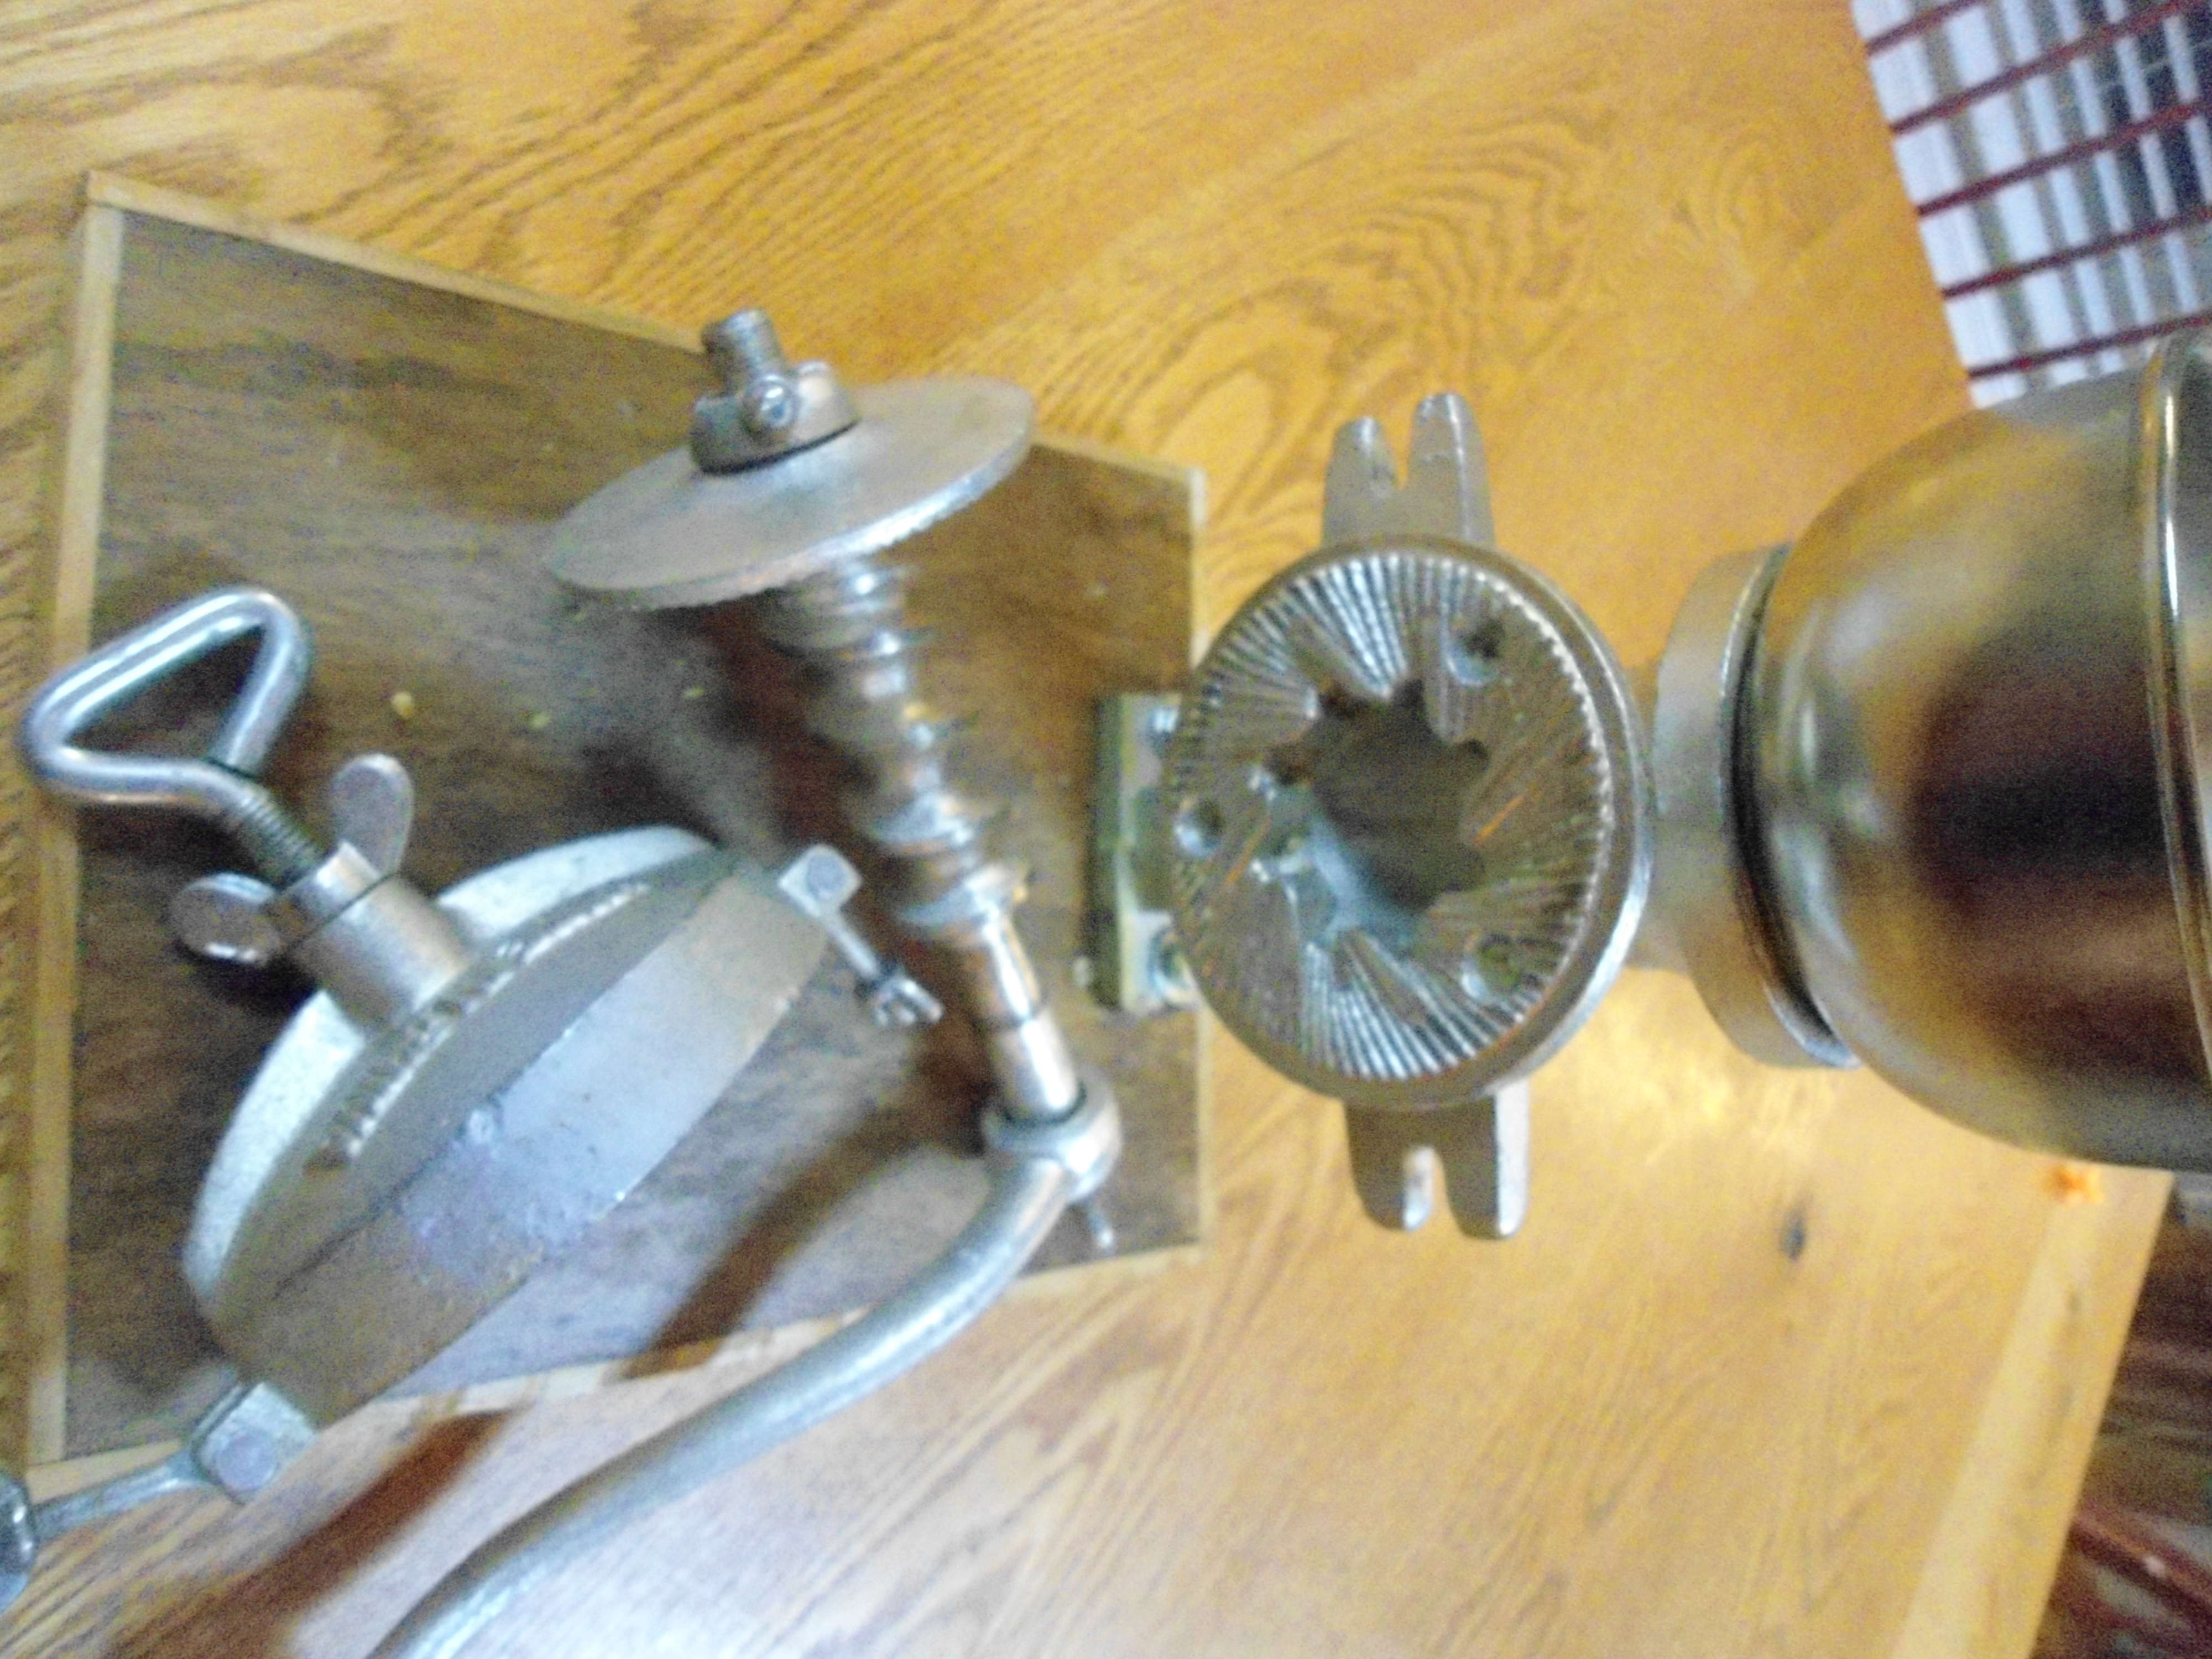
Dissembled Corn Mill

Dissembled Corn Mill

But that mill isn’t designed to make nixtamatal – which is why this cheap cast iron mill still sees loads of use in my home.  Fresh tortillas made from homemade nixtamatal are awesome – and this cheap mill and a good tortilla press make turning them out easy as well as cheap.  Bags of feed corn are running $10 for 50 pounds!

Now there is something that is lacking on these mills – all of those I have seen hold the front rotating burr in place with a cotter pin – which bends and allows the burr to slip back and freewheel.  This can be easily overcome by replacing the cotter pin with a bolt.

Apart from that weak part these mills are all pretty well and solidly made.  Sure, they look like they have loads of adjustment range – but I’ve got a number of slightly different variations and they all have loose tolerances, which is perfectly ok for grinding nixtamatal.

With prices starting at $25 you can order one on amazon and pick up a sack of feed corn and the fixin’s for a great night of Mexican food for less than the cost of the same meal out – and you’ll not only end the night with several meals worth of grain corn left but also with a mill that will last you a lifetime of enjoyable quality meals.

By

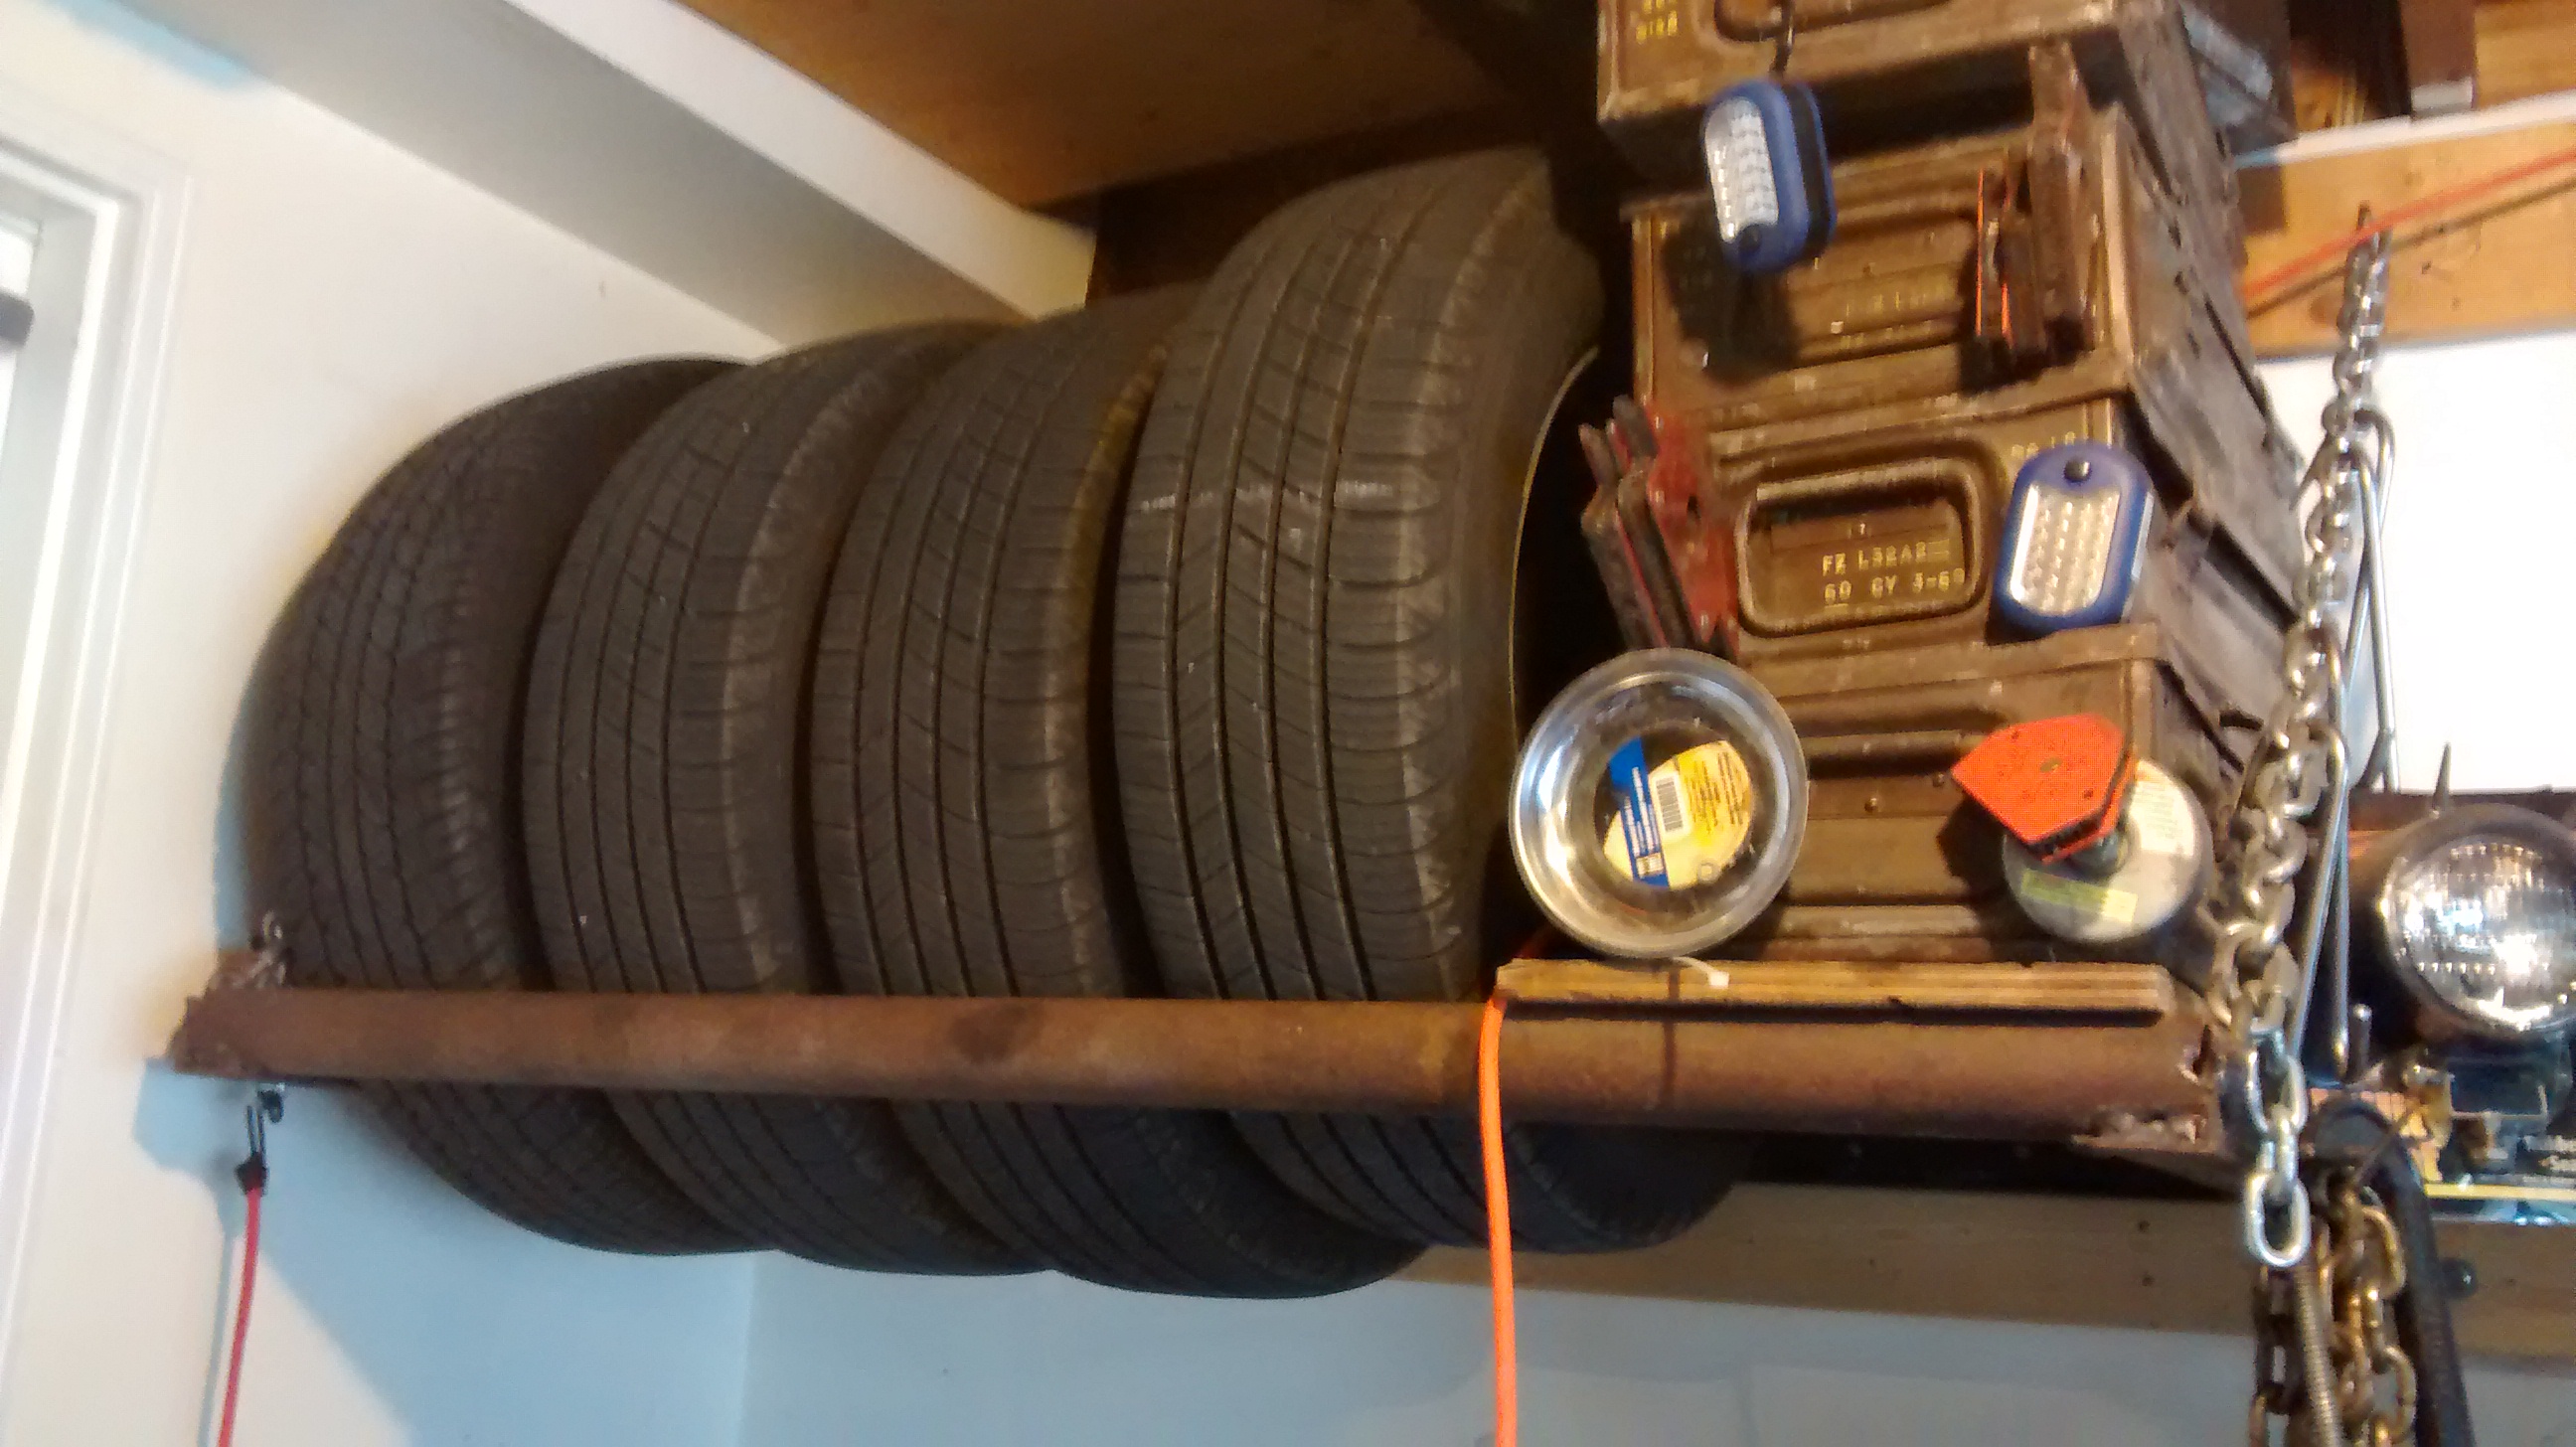
DIY Tire Rack – An Easy Welding Project

There is no doubt that having season appropriate tires for most vehicles offers a significant boost in safety in areas where the seasons change.  But, where do you stash the four tires that are for your alternate season?

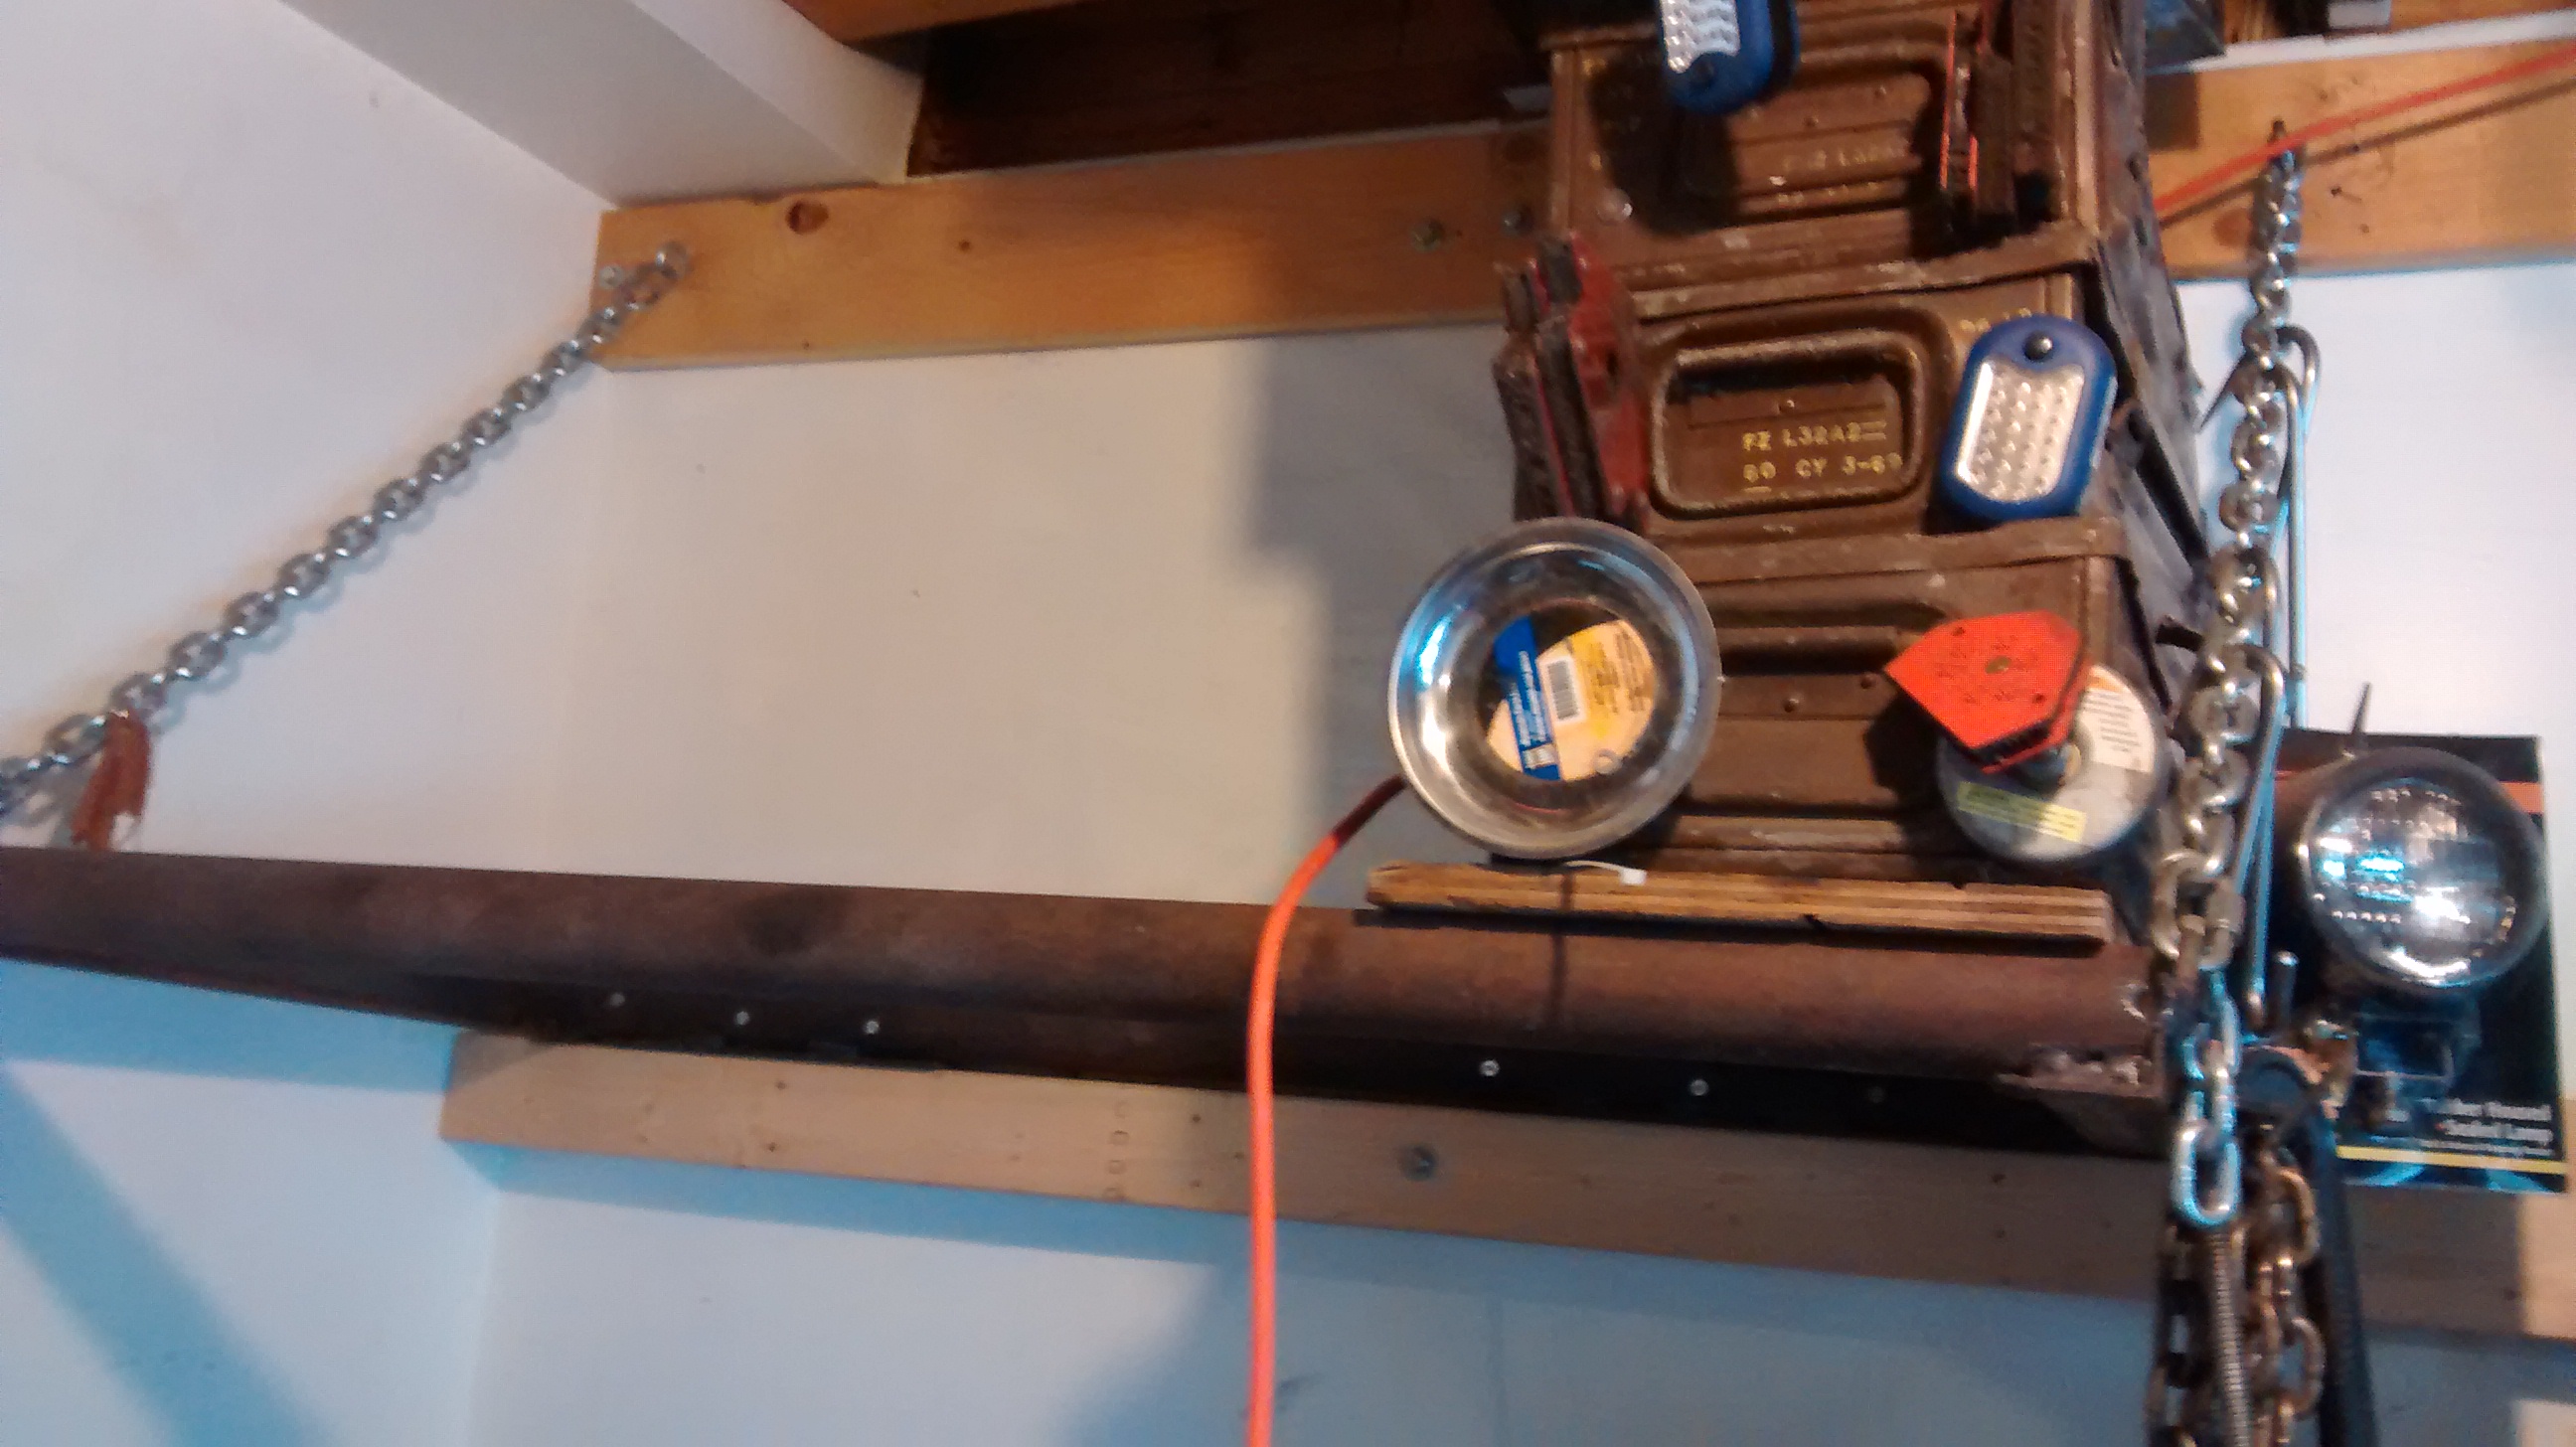
Wall mounted tire racks offer an easy low intrusion solution, and have become easy to purchase – but when I built this one a decade and a half ago they were much more expensive.  While price has dropped and availability has increased building your own continues to be a good opportunity to use your welding skills and will produce a much more solid rack at a fraction of the price of the light duty ones that are now so common.  This project is another good one to use steel you might have lying around or scrap that you can pick up at low cost.

View of the tire rack loaded

View of the tire rack loaded

Overall view of the Unloaded Tire Rack

Overall view of the Unloaded Tire Rack  

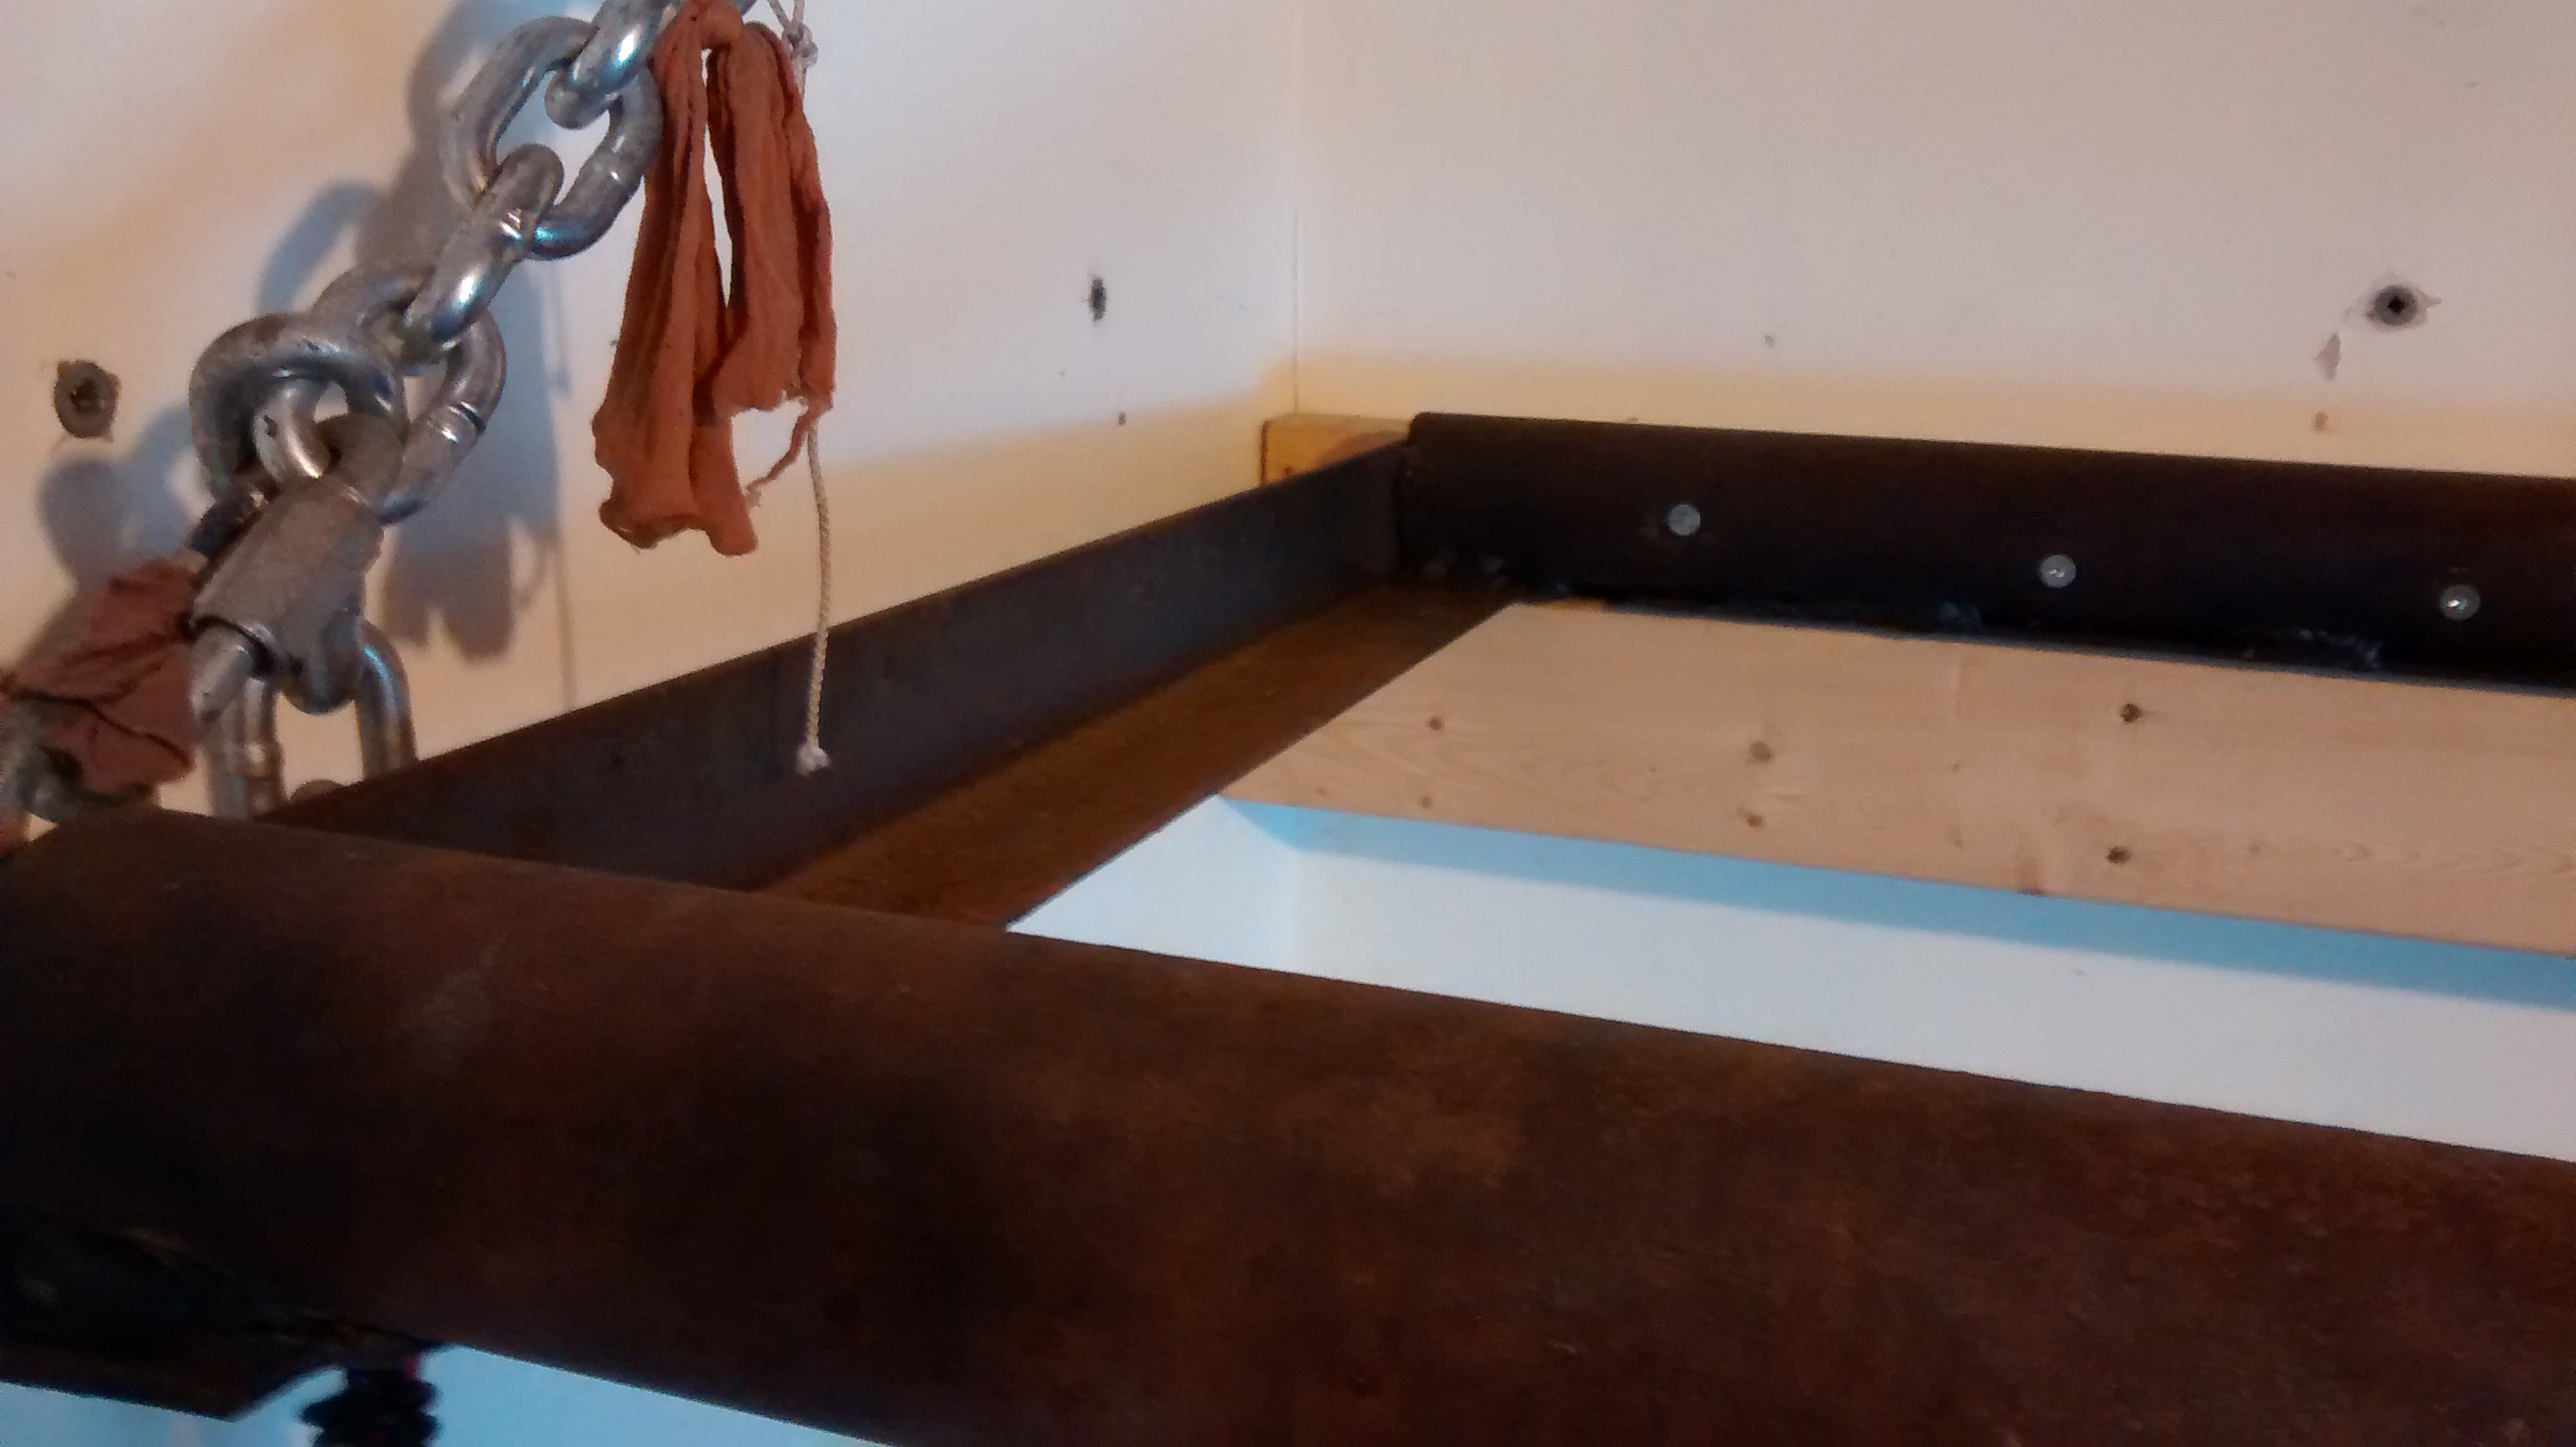
Frame construction for the Tire Rack 2" steel pipes separated by a piece of 2" angle iron

Frame construction for the Tire Rack 2″ steel pipes separated by a piece of 2″ angle iron

The frame is built of 2 2" steel pipes welded to a piece of 2" angle iron

The frame is built of 2 2″ steel pipes welded to a piece of 2″ angle iron

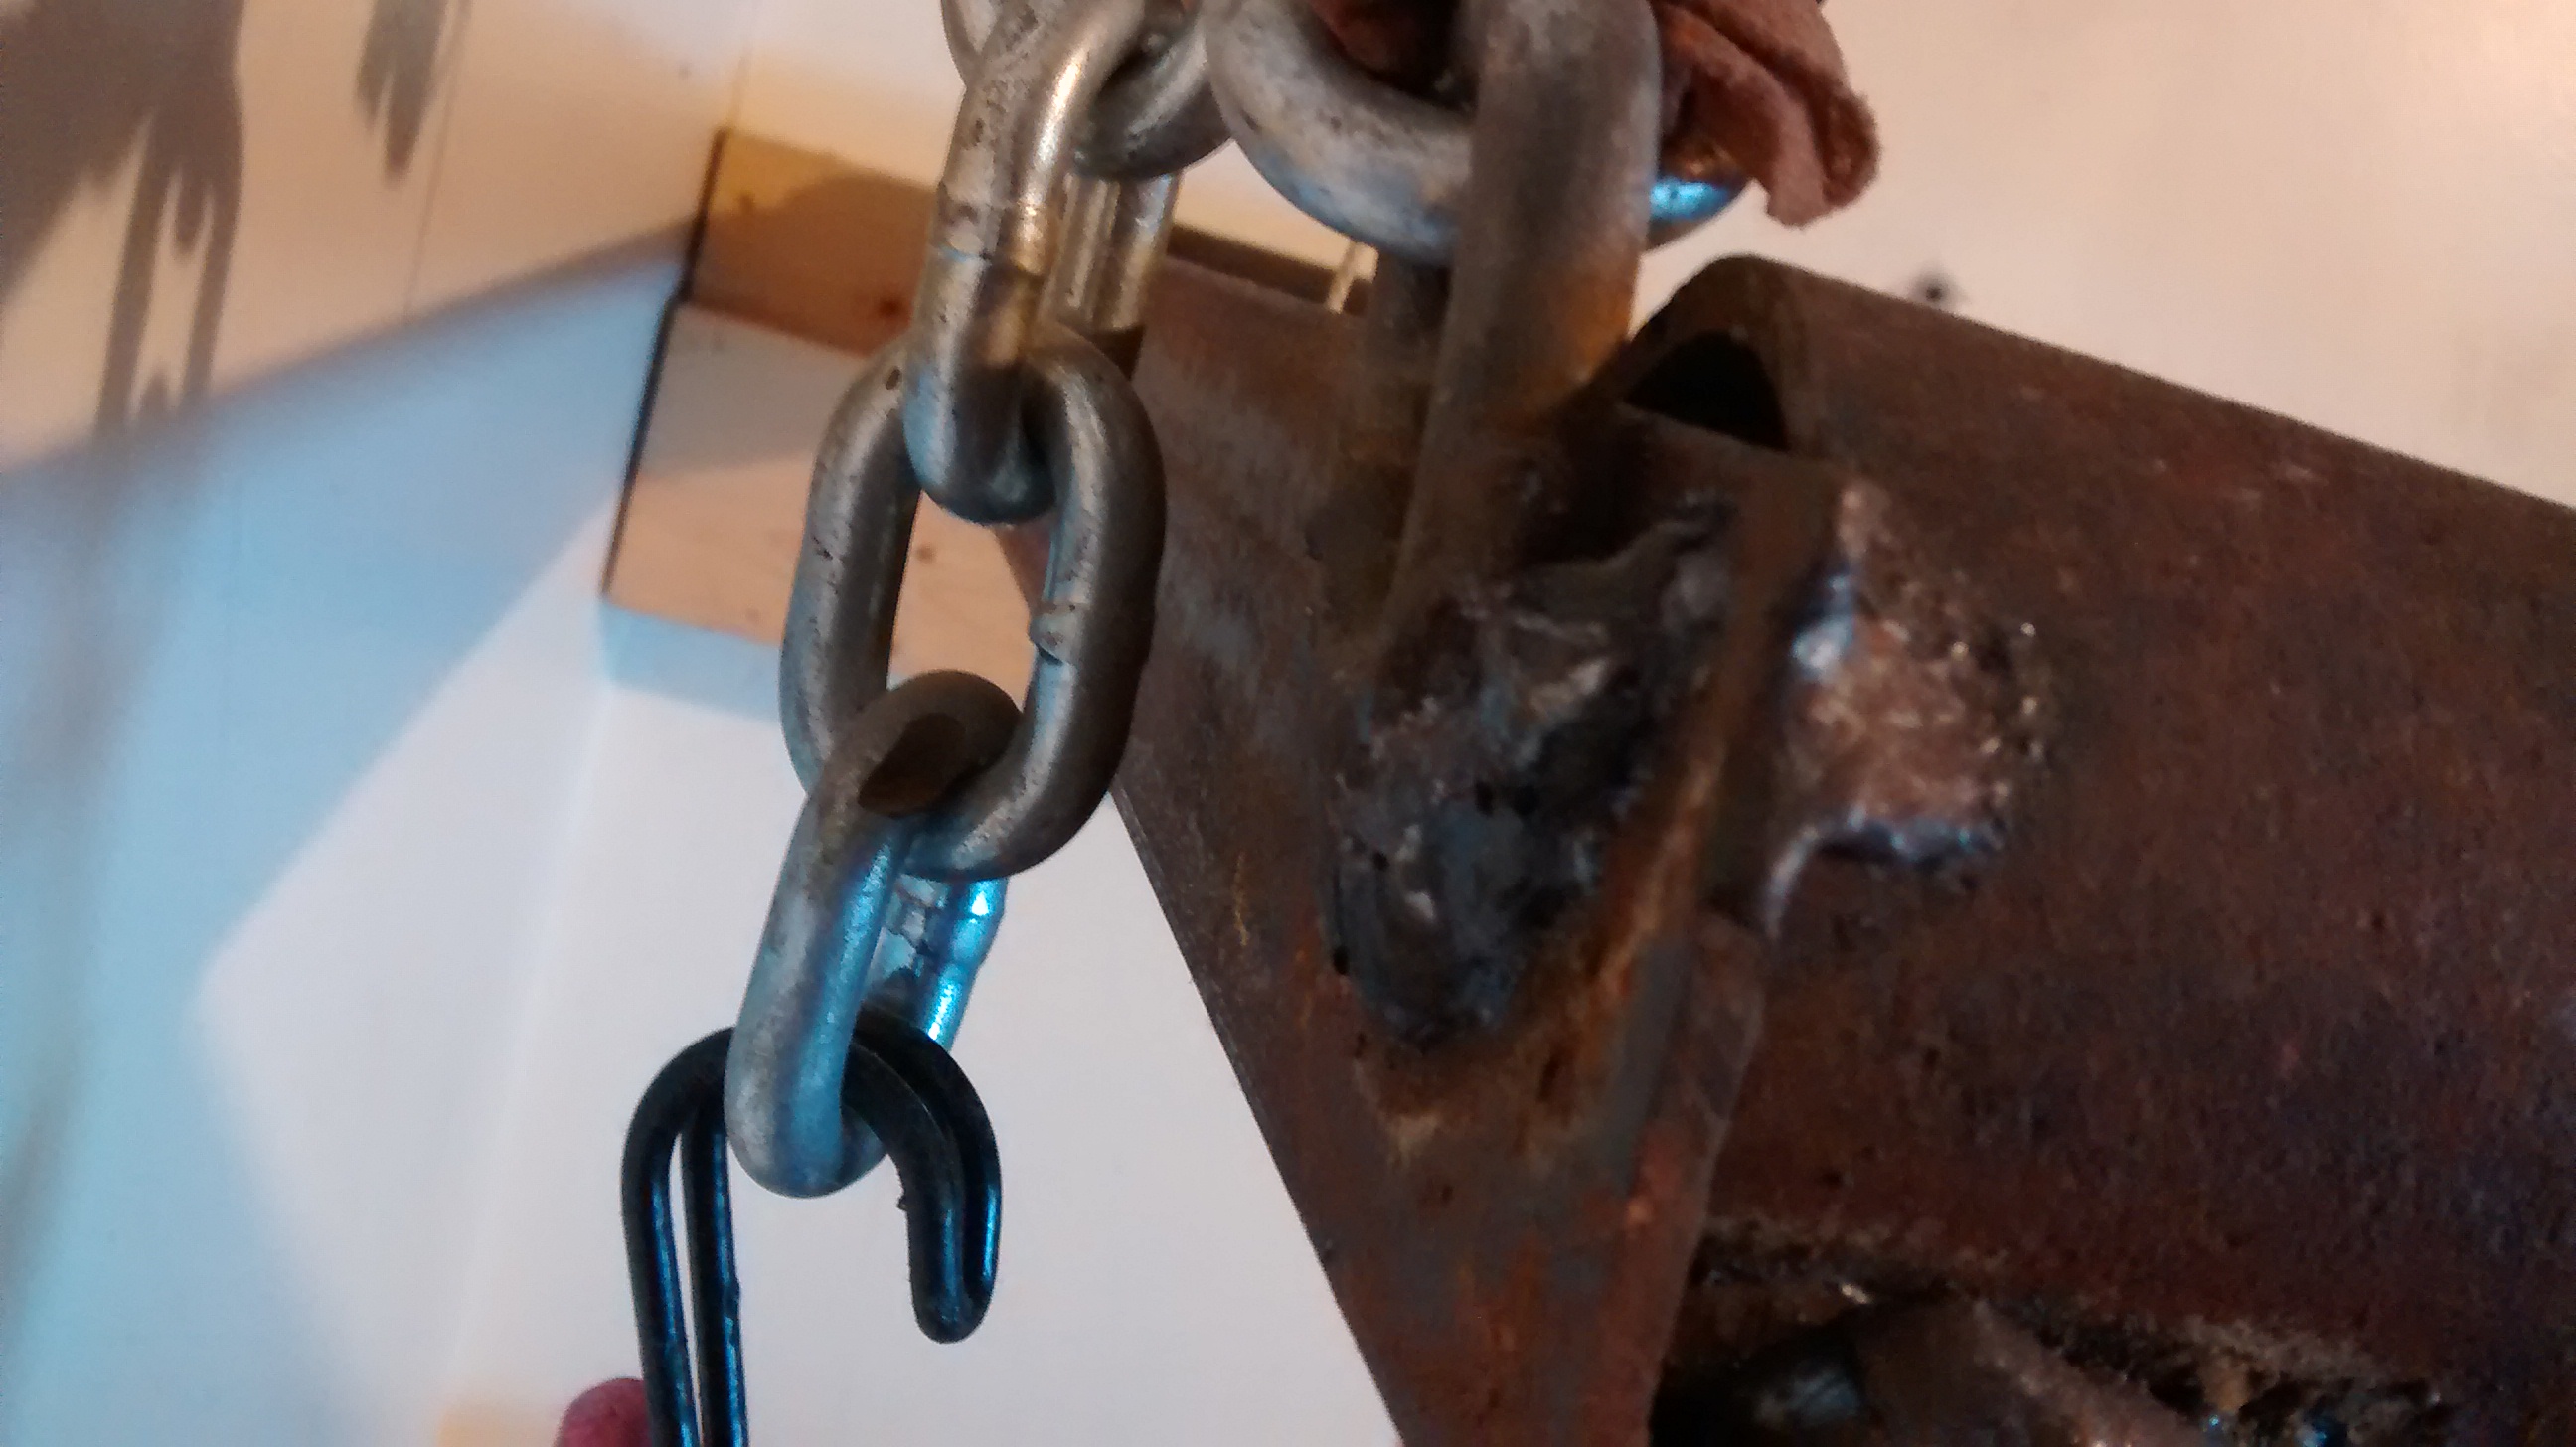
A piece of chain welded to the frame and connected to the length of chain with a piece of screw chain link

A piece of chain welded to the frame and connected to the length of chain with a quick link

IMG_20151111_112230572

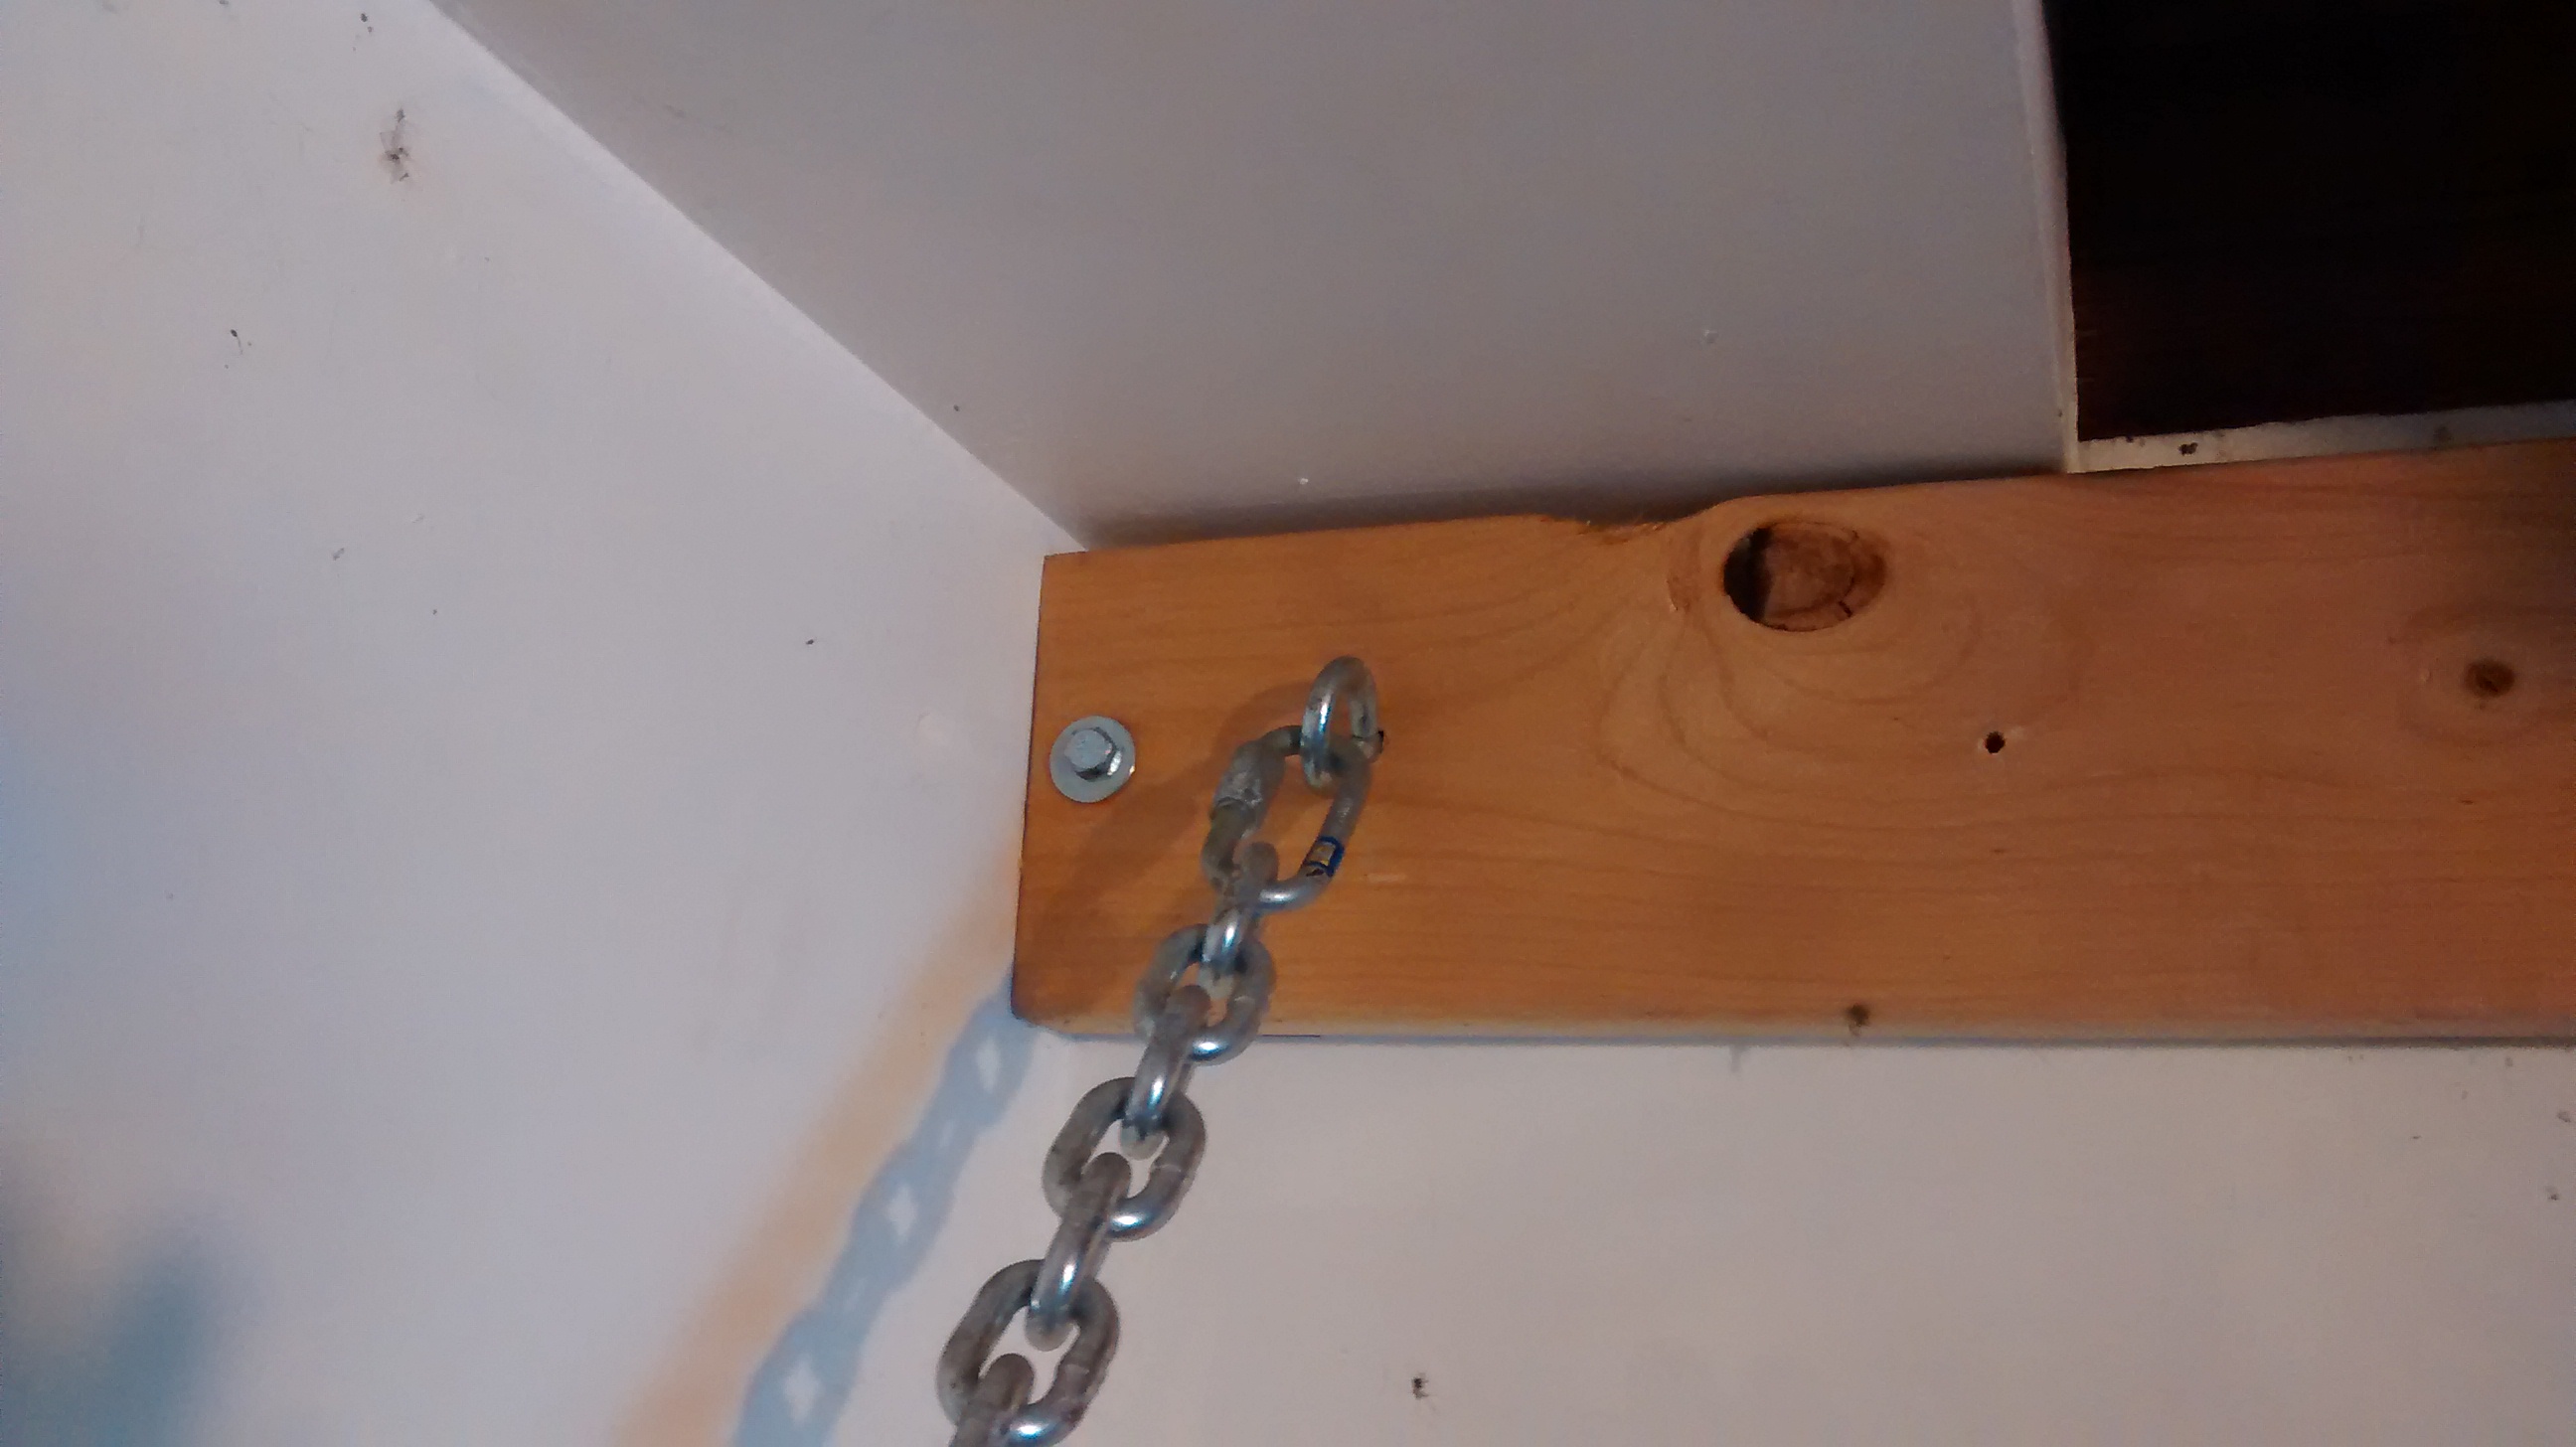
On the wall top the chain is connected to the eyebolt through the top 2×6 with a quick link

IMG_20151111_112222842

Holes are drilled though the pipe for screws to pass through to secure the frame into the lower support. The rear piece is a 2×6 and the lower piece is a 2×4 creating an L shaped shelf. A short segment of 2″ angle iron is welded to the rear pipe to create a flatter bearing surface.

On the wall top the chain is connected to the  eyebolt through the top 2x6 with a quick link

On the wall top the chain is connected to the eyebolt through the top 2×6 with a quick link

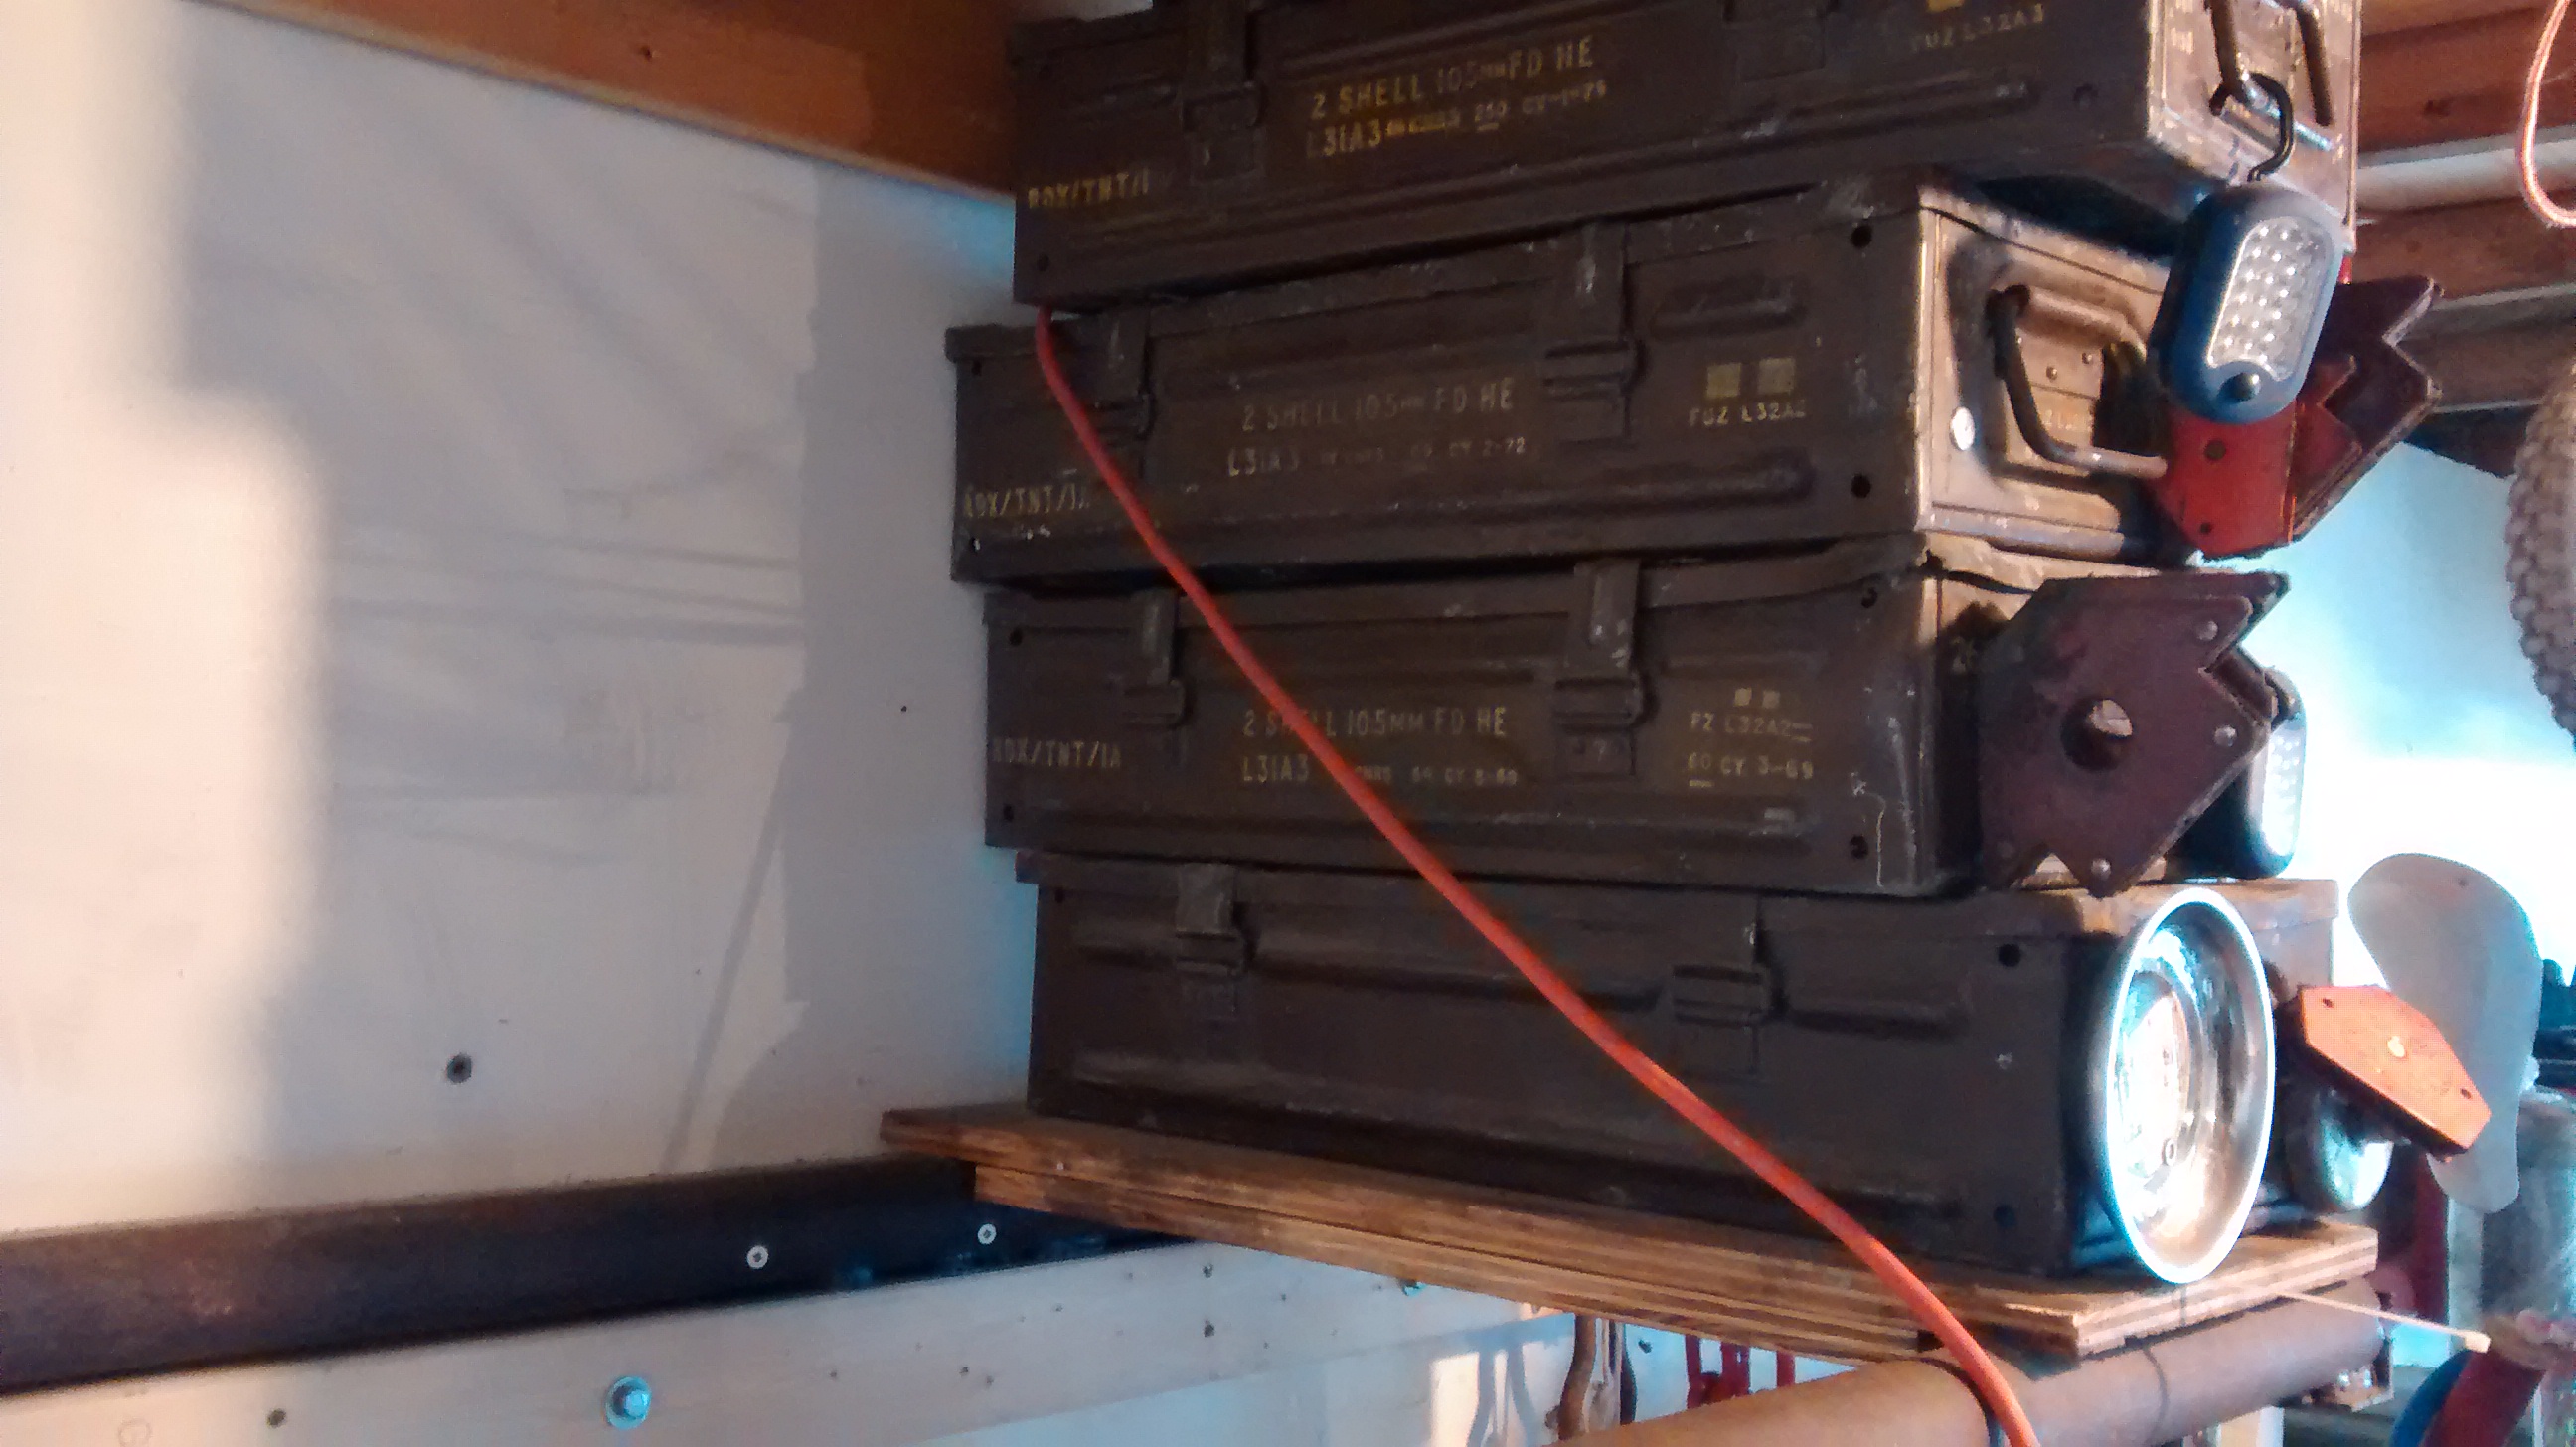
Additional length is used for a shelf to hold ammo cans with specialty auto repair tools

Additional length is used for a shelf to hold ammo cans with specialty auto repair tools

By

Table Lamp from Auto Spring – An Easy Welding project

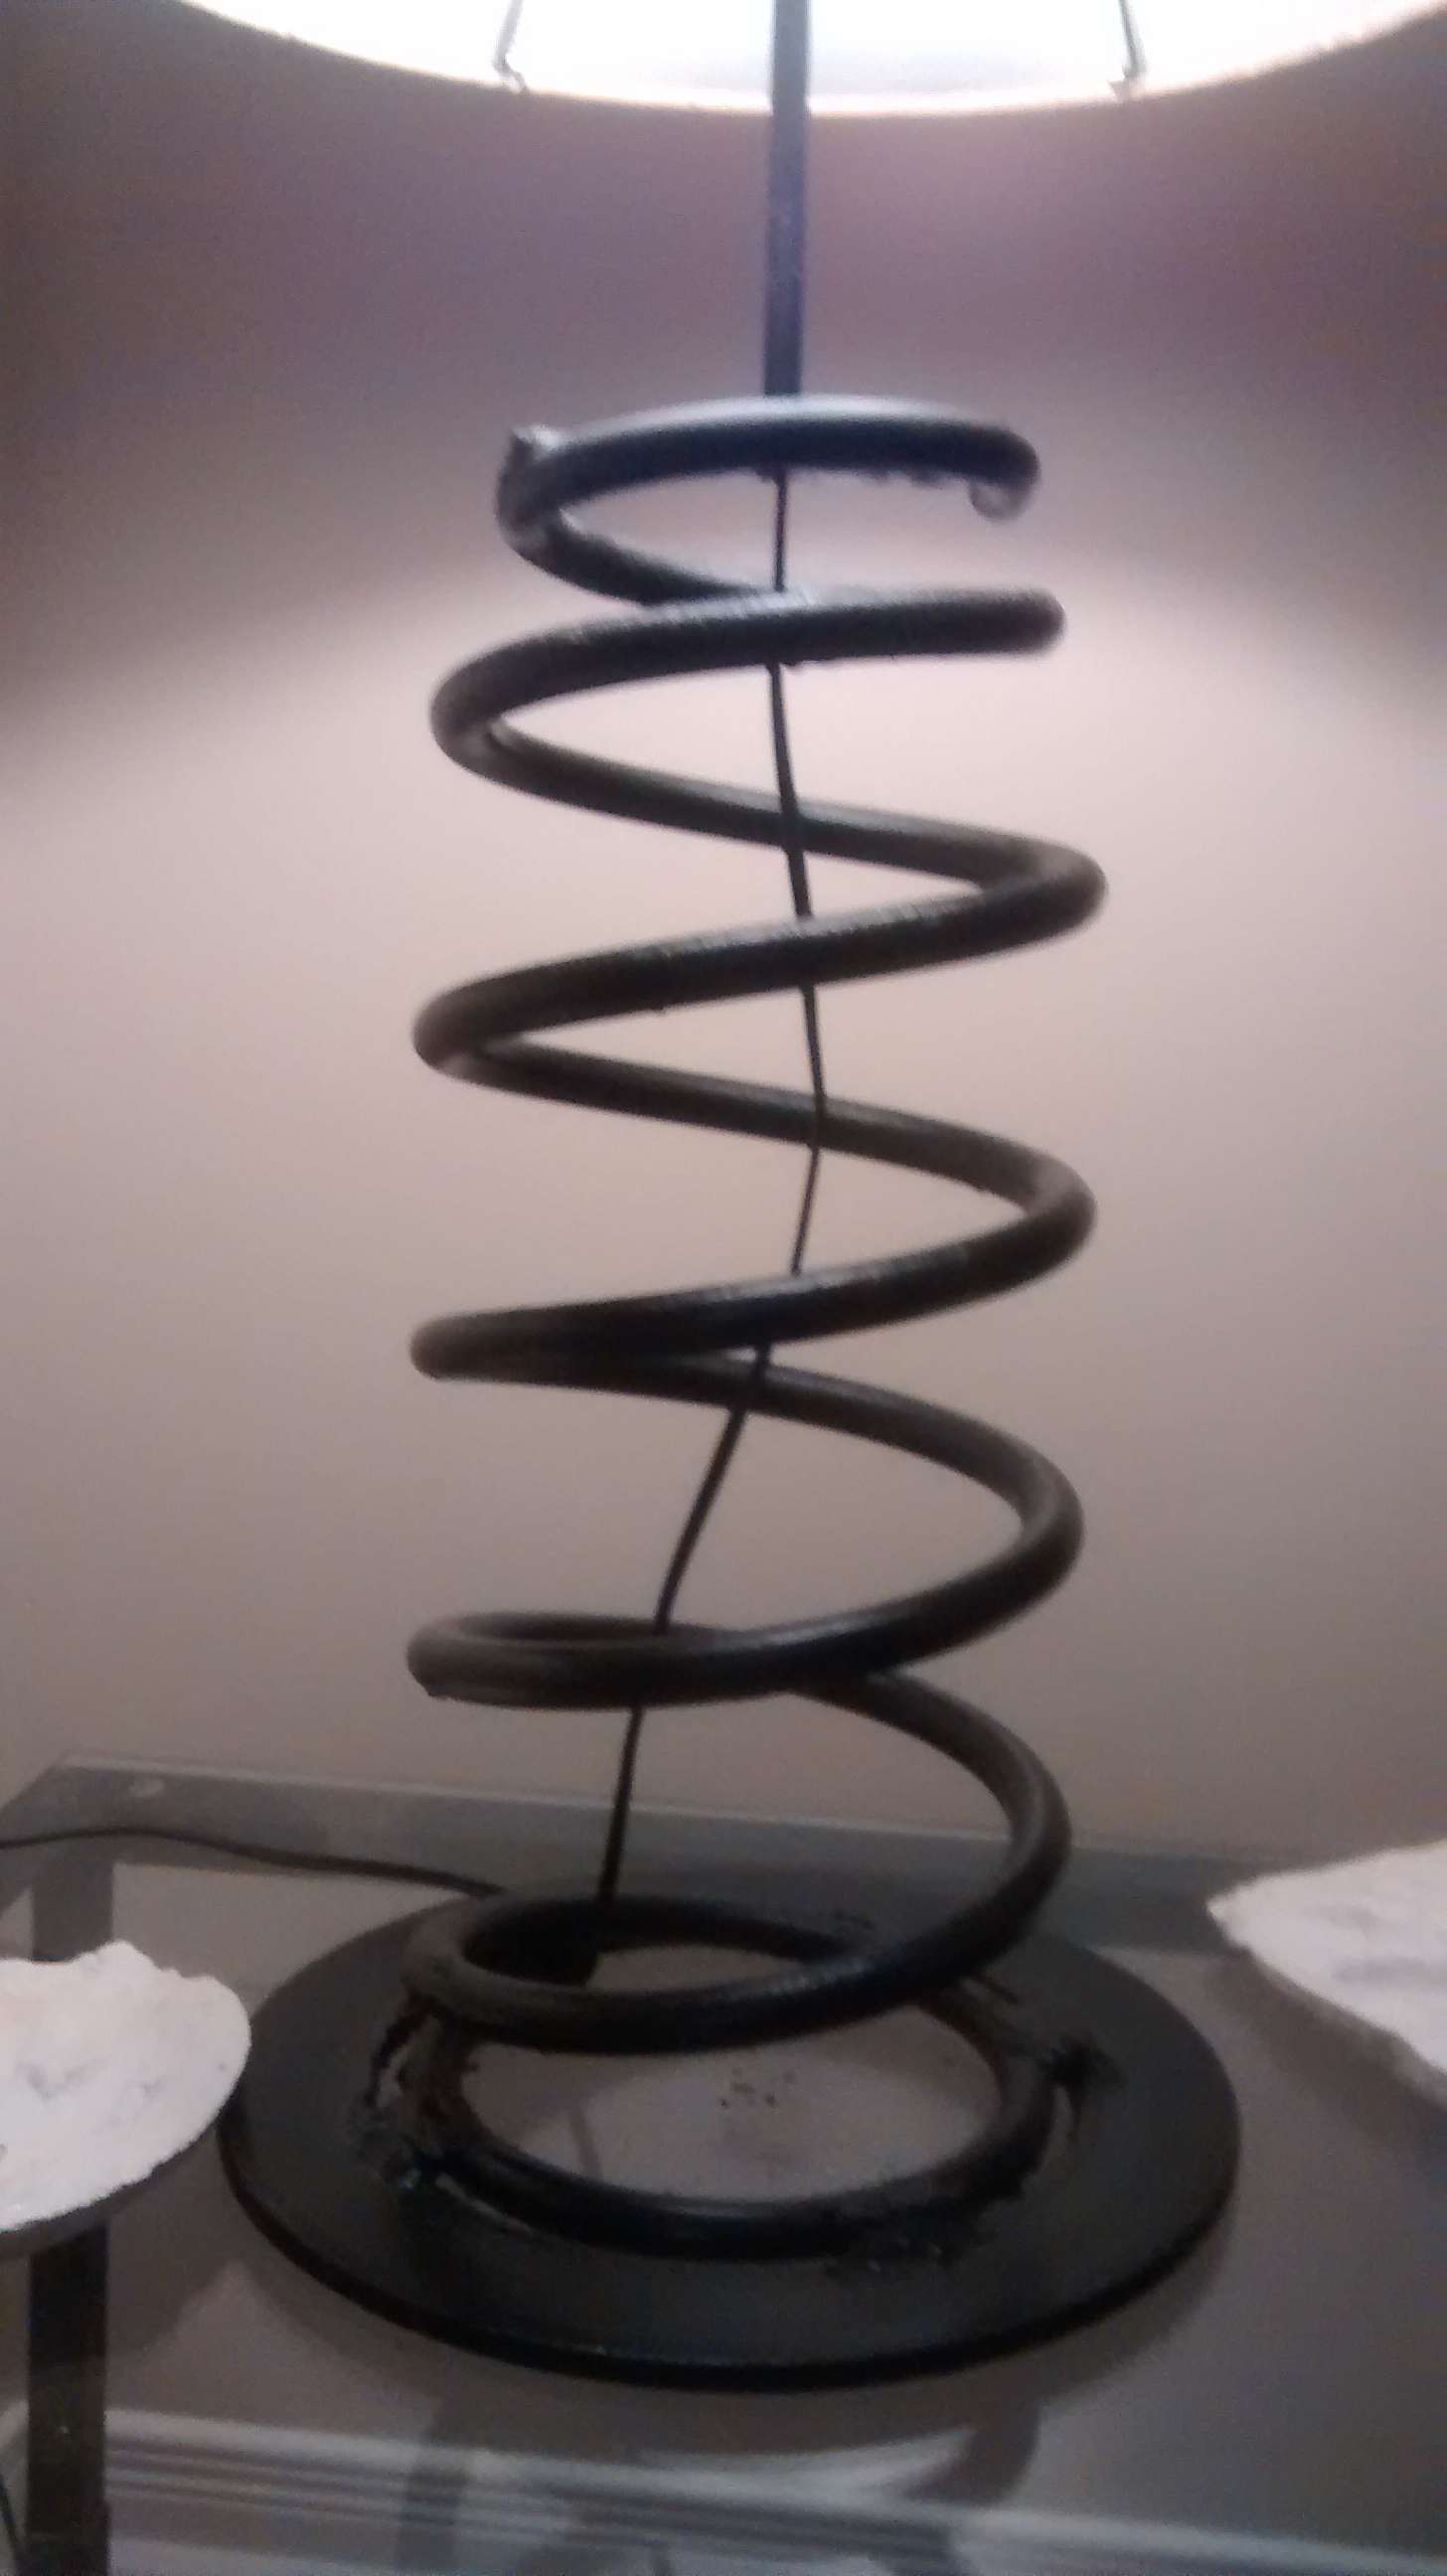
Table lamp made from a coil spring and a disk brake

Table lamp made from a coil spring and a disk brake

When you start to develop skills you’ll increasingly see new opportunities opened up to employ them – often in ways that you may not have even guessed at when you first set off down that path.  That’s true of gaining metal working skills – originally I wanted to be able to build and repair machinery and tools… but with time I’ve ended up producing quite a few pieces of furniture.  Now some of those have been ones I could have purchased if I’d wanted to run up my credit card bill, others aren’t particularly special in terms of design but rather of fit – in terms of dimensions, sometimes the right size is just not available in store.

But others, well those are a bit more unique – flights of creative fancy, and I think this table lamp made from an auto coil spring and a disk brake is a good example of that.  Total cost – about $2 for some 1/4″ threaded gas pipe from HomeDepot.  If you needed to buy it the bulb base, lampshade hoop and cord would have been about $10 more – but in this case I just walked the pup a bit further on the night before garbage day and snagged an ugly light from a neighbours trash that provided the right elements for free.

Lower portion of the lamp - showing the welds between the disk and the spring

Lower portion of the lamp – showing the welds between the disk and the spring

The lamp itself is simple enough.  The body is the front coil spring from a ford windstar – one failed on my old van and this was the one that was still intact when I replaced the two of them.  To give a broader but low profile base I took a disk brake and used the angle grinder to cut the hub projection from the braking surface.  Since the spring didn’t quite meet up with the disk I slipped some scrap steel in between to bridge the gap then welded the three (spring, filler material, disk) together at a few points.

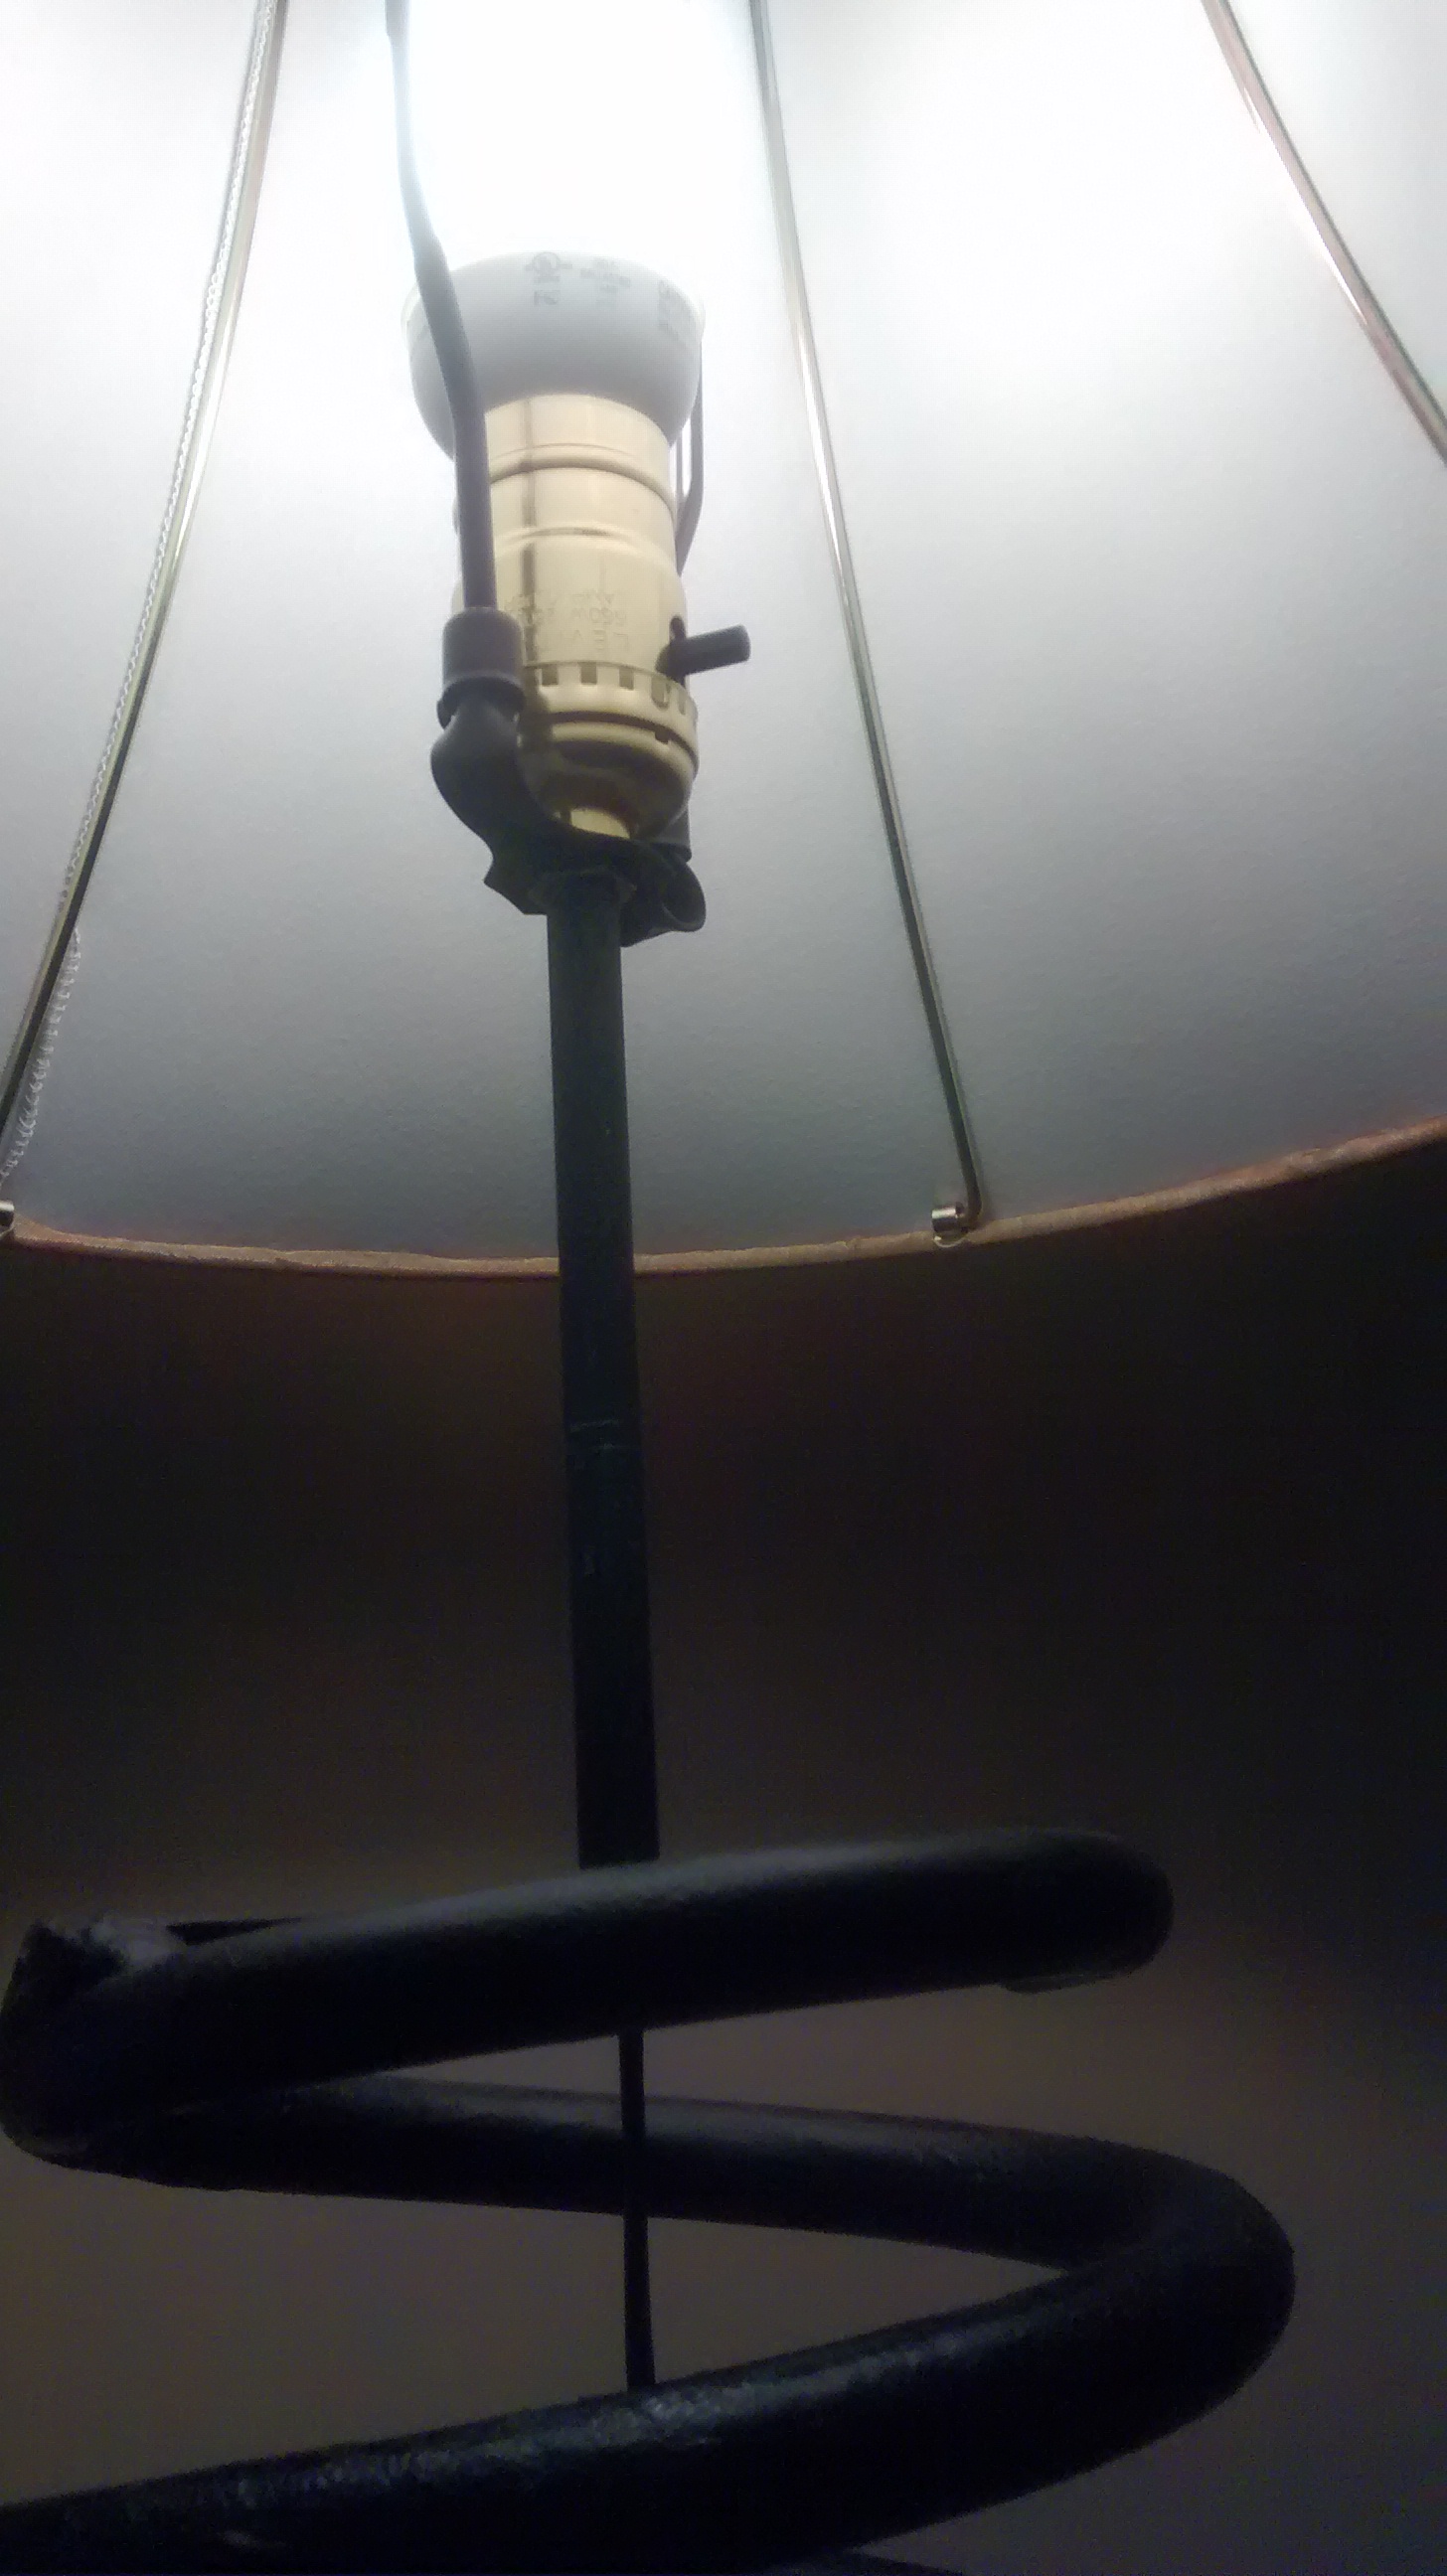
At the top of the coil I welded a piece of 1″ by 1/4″ thick steel (just a scrap piece I had on hand) across the coil, drilled and tapped it for the 1/4″ NPT pipe segment which the lamp base screwed into on the other end a coat of black spraypaint and the lamp was done.

Upper segment of the lamp - showing how the light base is mounted

Upper segment of the lamp – showing how the light base is mounted

Now if you don’t have the tools – primarily the angle grinder and a welder don’t be scared off.  They are both low cost and wire feed welders make OK welding incredibly easy to do.

Now even if you’d have to head out to the scrap yard for inspiration it wouldn’t have cost you more than about $30, but what would one of these sell for in some artistic store? But more importantly, how much satisfaction are you going to gain from exercising your intrinsic creativity – and equally once that door opens how many more opportunities are you going to see to grow and exercise an expanding skill set.

So when you look at metal working skills consider what tickles your fancy – for me I entered because I wanted to build and repair machinery but ended up also doing a lot of creative work.  For you it may well be reverse – either way you’ll end up seeing possibilities grow as you gain capability.

By

L.L. Bean Boots Review

L.L Bean boots p the ultimate bush boot

L.L Bean boots the ultimate bush boot

I’m a fan of these L.L. Bean boots, and while I inherited my first pair from my grandfather my sensibility trumps my sentimentality.  For example, I’ve got a lovely “Woods” canvas duck and game coat, heavy durable canvas, wool lining, button up lower rubber lined segment that dates from the same era as these boots – its a lovely coat, but it has been totally eclipsed by modern materials which are lighter, warmer, more weatherproof and better able to adapt to changing conditions. These boots by contrast – still rock, and are in my opinion the best boots for hunting and hiking off the beaten track on soft soils (as opposed to rocky surfaces)  let me count the reasons why…

  1. Right match of flexibility and support
    • Rubber and leather – it’s a great combination that is probably the closest you can get to the flexibility of a leather moccasin with better wear and water proof capabilities.  The leather uppers hit the right spot for flexibility when hiking and hill climbing while also offering ankle support and nearly as importantly protecting your lower legs from getting stuck poked and pinched as you scramble through the bush.
  2. Comfortable
    • I’m not saying it’s not nice to pull these off at the end of a long day, but if I had to live in one set of boots – these would be them.  They are very comfortable.
  3. Light weight
    • Now the reason that Wood’s coat often stays in the closet is because of weight. While weight isn’t going to be as much of a factor if you are staying close to a vehicle, if you are heading off into the bush what weight you carry better be well thought out.  I’d rather toss in extra batteries for a headlamp, some candy, a second compass and another box of ammo – all useful weight rather than useless weight in a boot, these are just what you need and nothing more without being so lightweight you give up all the advantages of a boot over a shoe.
  4. Bean boots do fine on hilly terrain

    Bean boots do fine on hilly terrain

    Waterproof way way up

    • I often end up walking around swamps, wet spots, old logging trails, and peat bogs, lots of wet spots.  The extra height of the leather uppers available with these boots is something I love.  Quite often I might not lace them all the way up – unless the scrambling is going to get tough – but the height of the leather lets you choose the easier path which might be wetter.   Get the highest leathers you can manage – you don’t want to be regretting not getting the extra two inches when walking through a beaver marsh or when wondering how deep the muck goes in that old skidder track.  The same goes for snow – these make great winter boots.  Get some dubbin and apply it a few times a year.
  5. Reasonable grip
    • Note I say reasonable not aggressive.  The tread looks on first glace to be one that shouldn’t be very sound, but in practice it gets the job done from walking through muck, on leaf and needle litter on steep slopes, on snow and ice.  My guess is that the flexibility of the sole sees much greater proportion of contact which compensates for the less aggressive grip compared to harder thicker soled footwear.
  6. Bean boots are great for making your way around beaver ponds and marshes.

    Bean boots are great for making your way around beaver ponds and marshes.

    No liners

    • There are lots of gimmicks out there to dry boot liners, from stands over hot air registers to heated blowers specifically to help drying out the liner.  I hate those felt or other materials, they wear and they are a pain to dry and they also limit the boot to one environment – usually winter.  My Bean boots are sized to allow me to wear some nice wool blend socks – not cheap socks – but rather the kind of socks that your feet are happy the live in.  I vary the weight depending upon the weather – in summer the socks are lighter, in winter heavier.  If you should happen to get wet… well the drying procedure is remove boots, drain, switch socks and maybe the insoles.  Oh yeah, in the light weight section I should probably have mentioned that part of the compensating weight I prefer to carry are a couple of extra socks.  That’s it, that simple – and able to be done anywhere.
  7. Durable
    • This current pair is about twelve years old and has seen a lot of use in all seasons and is just as nice if not nicer than the day I unboxed them.  They replaced a set my grandfather who was a forester passed onto me.  Those lasted me a good piece of time, and undoubtedly served him for decades before, when they failed it was the sole of the rubber lower that wore out.  That’s pretty good value.

So where wouldn’t I use these?  Well if you are moving over a lot of sharp rock I’d want a tougher sole.  If you are trail running, go with a trail shoe.  But otherwise L.L. Bean came up with an awesome and timeless design for a great bush (and winter) boot.  Treat your feet right and get a pair.

By

Vintage Hobart Stand Mixer Refinished

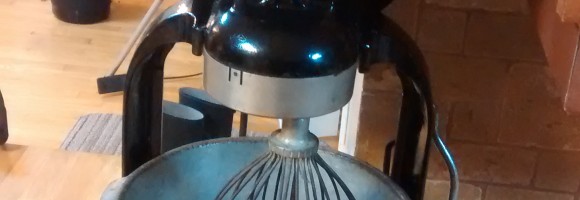
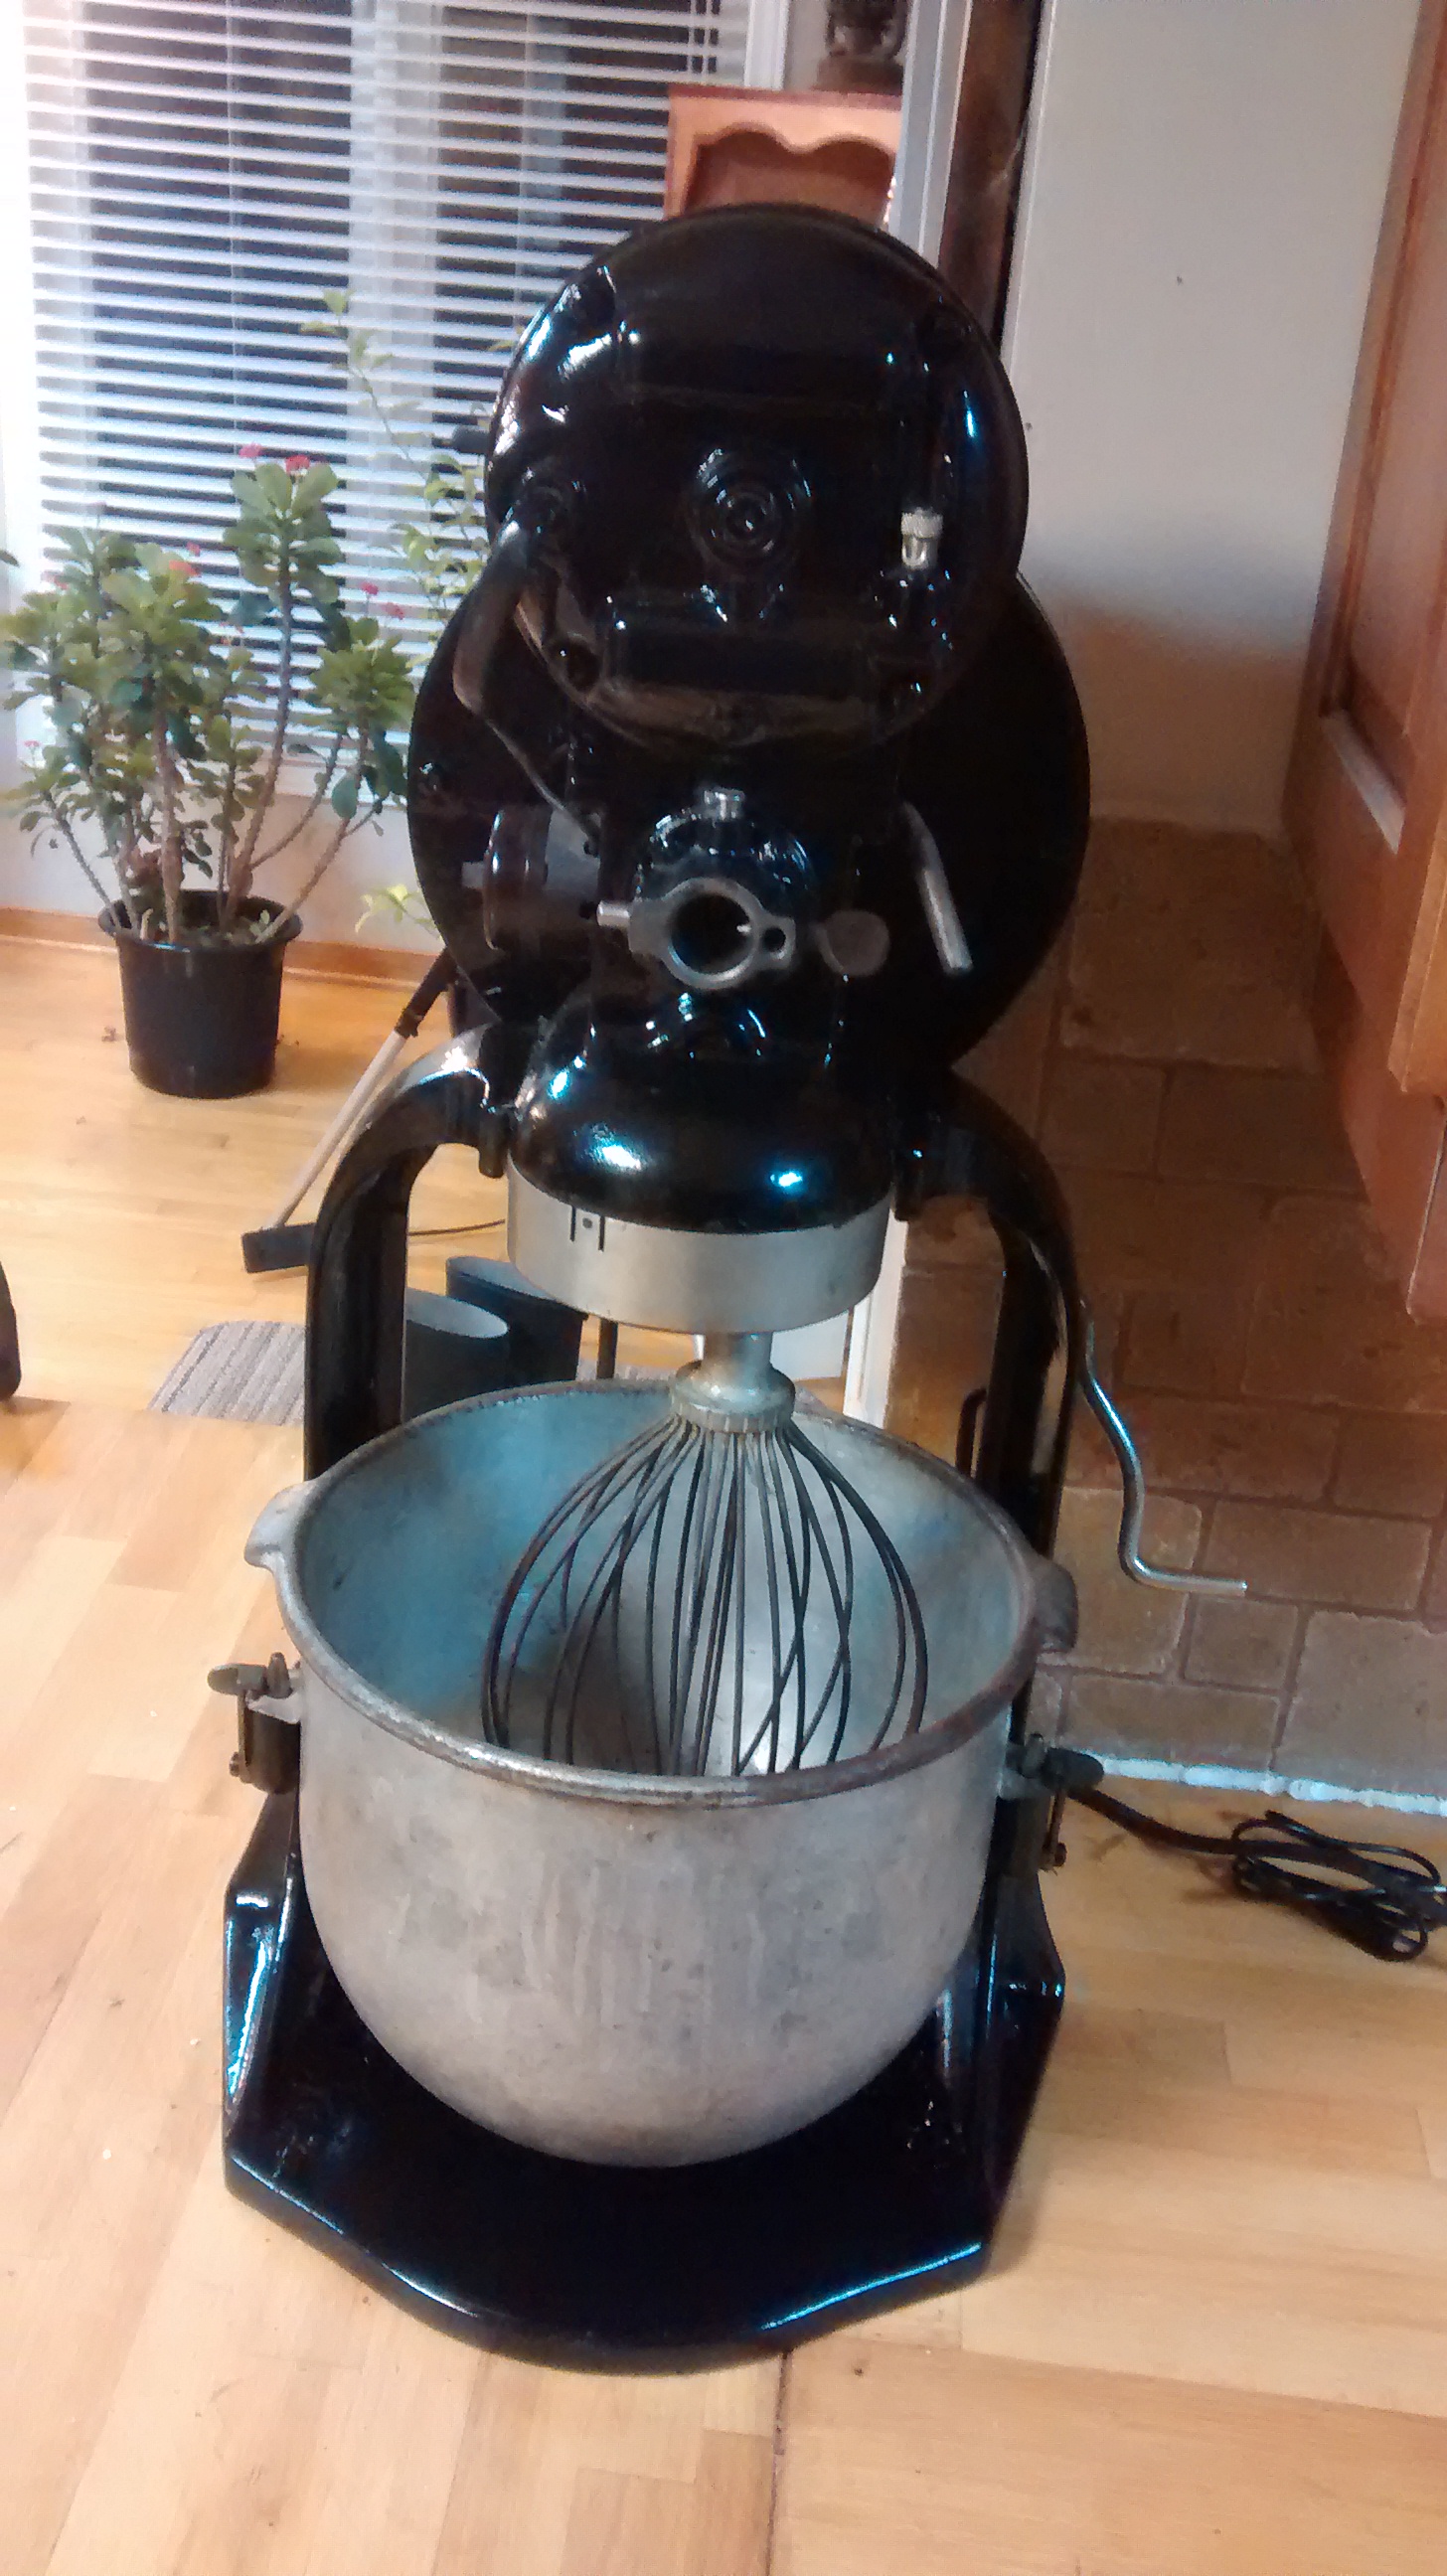
Refinished Vintage Hobart C210 Stand Mixer

Refinished Vintage Hobart C210 Stand Mixer

So I just completed the refinishing process for my Hobart C210 stand mixer and it looks great.  I started by disassembling the unit as much as I could – carefully labling the fasteners in ziploc sandwich bags so that I’d be able to find them and identify where they needed to go easily when it came time to do the reassembly.  Then I used  the wire wheel on the angle grinder to strip the original paint and rust back to bare metal.

With a clean surface to work from I applied about a dozen thin coats of gloss black rust paint (Just the hardware store brand) from spray cans.  While I have lots of gloss black rust paint AND the air powered sprayer to apply it the amount of work – and the frequency at which the thin coats needed to be applied meant that it would have been way more work (and probably money) to fool around with a system that fits much better with large application requirements rather than this tiny job.

I guess I should also note that I masked the maker tags, the oilers and the motor vents and the sliding surfaces before starting to paint.  I applied several thin coats of paint at most twice per day until I had built up a nice solid paint layer – then after allowing the paint a few more days to harden I moved the components around so that I could paint the segments that were still needing painting.

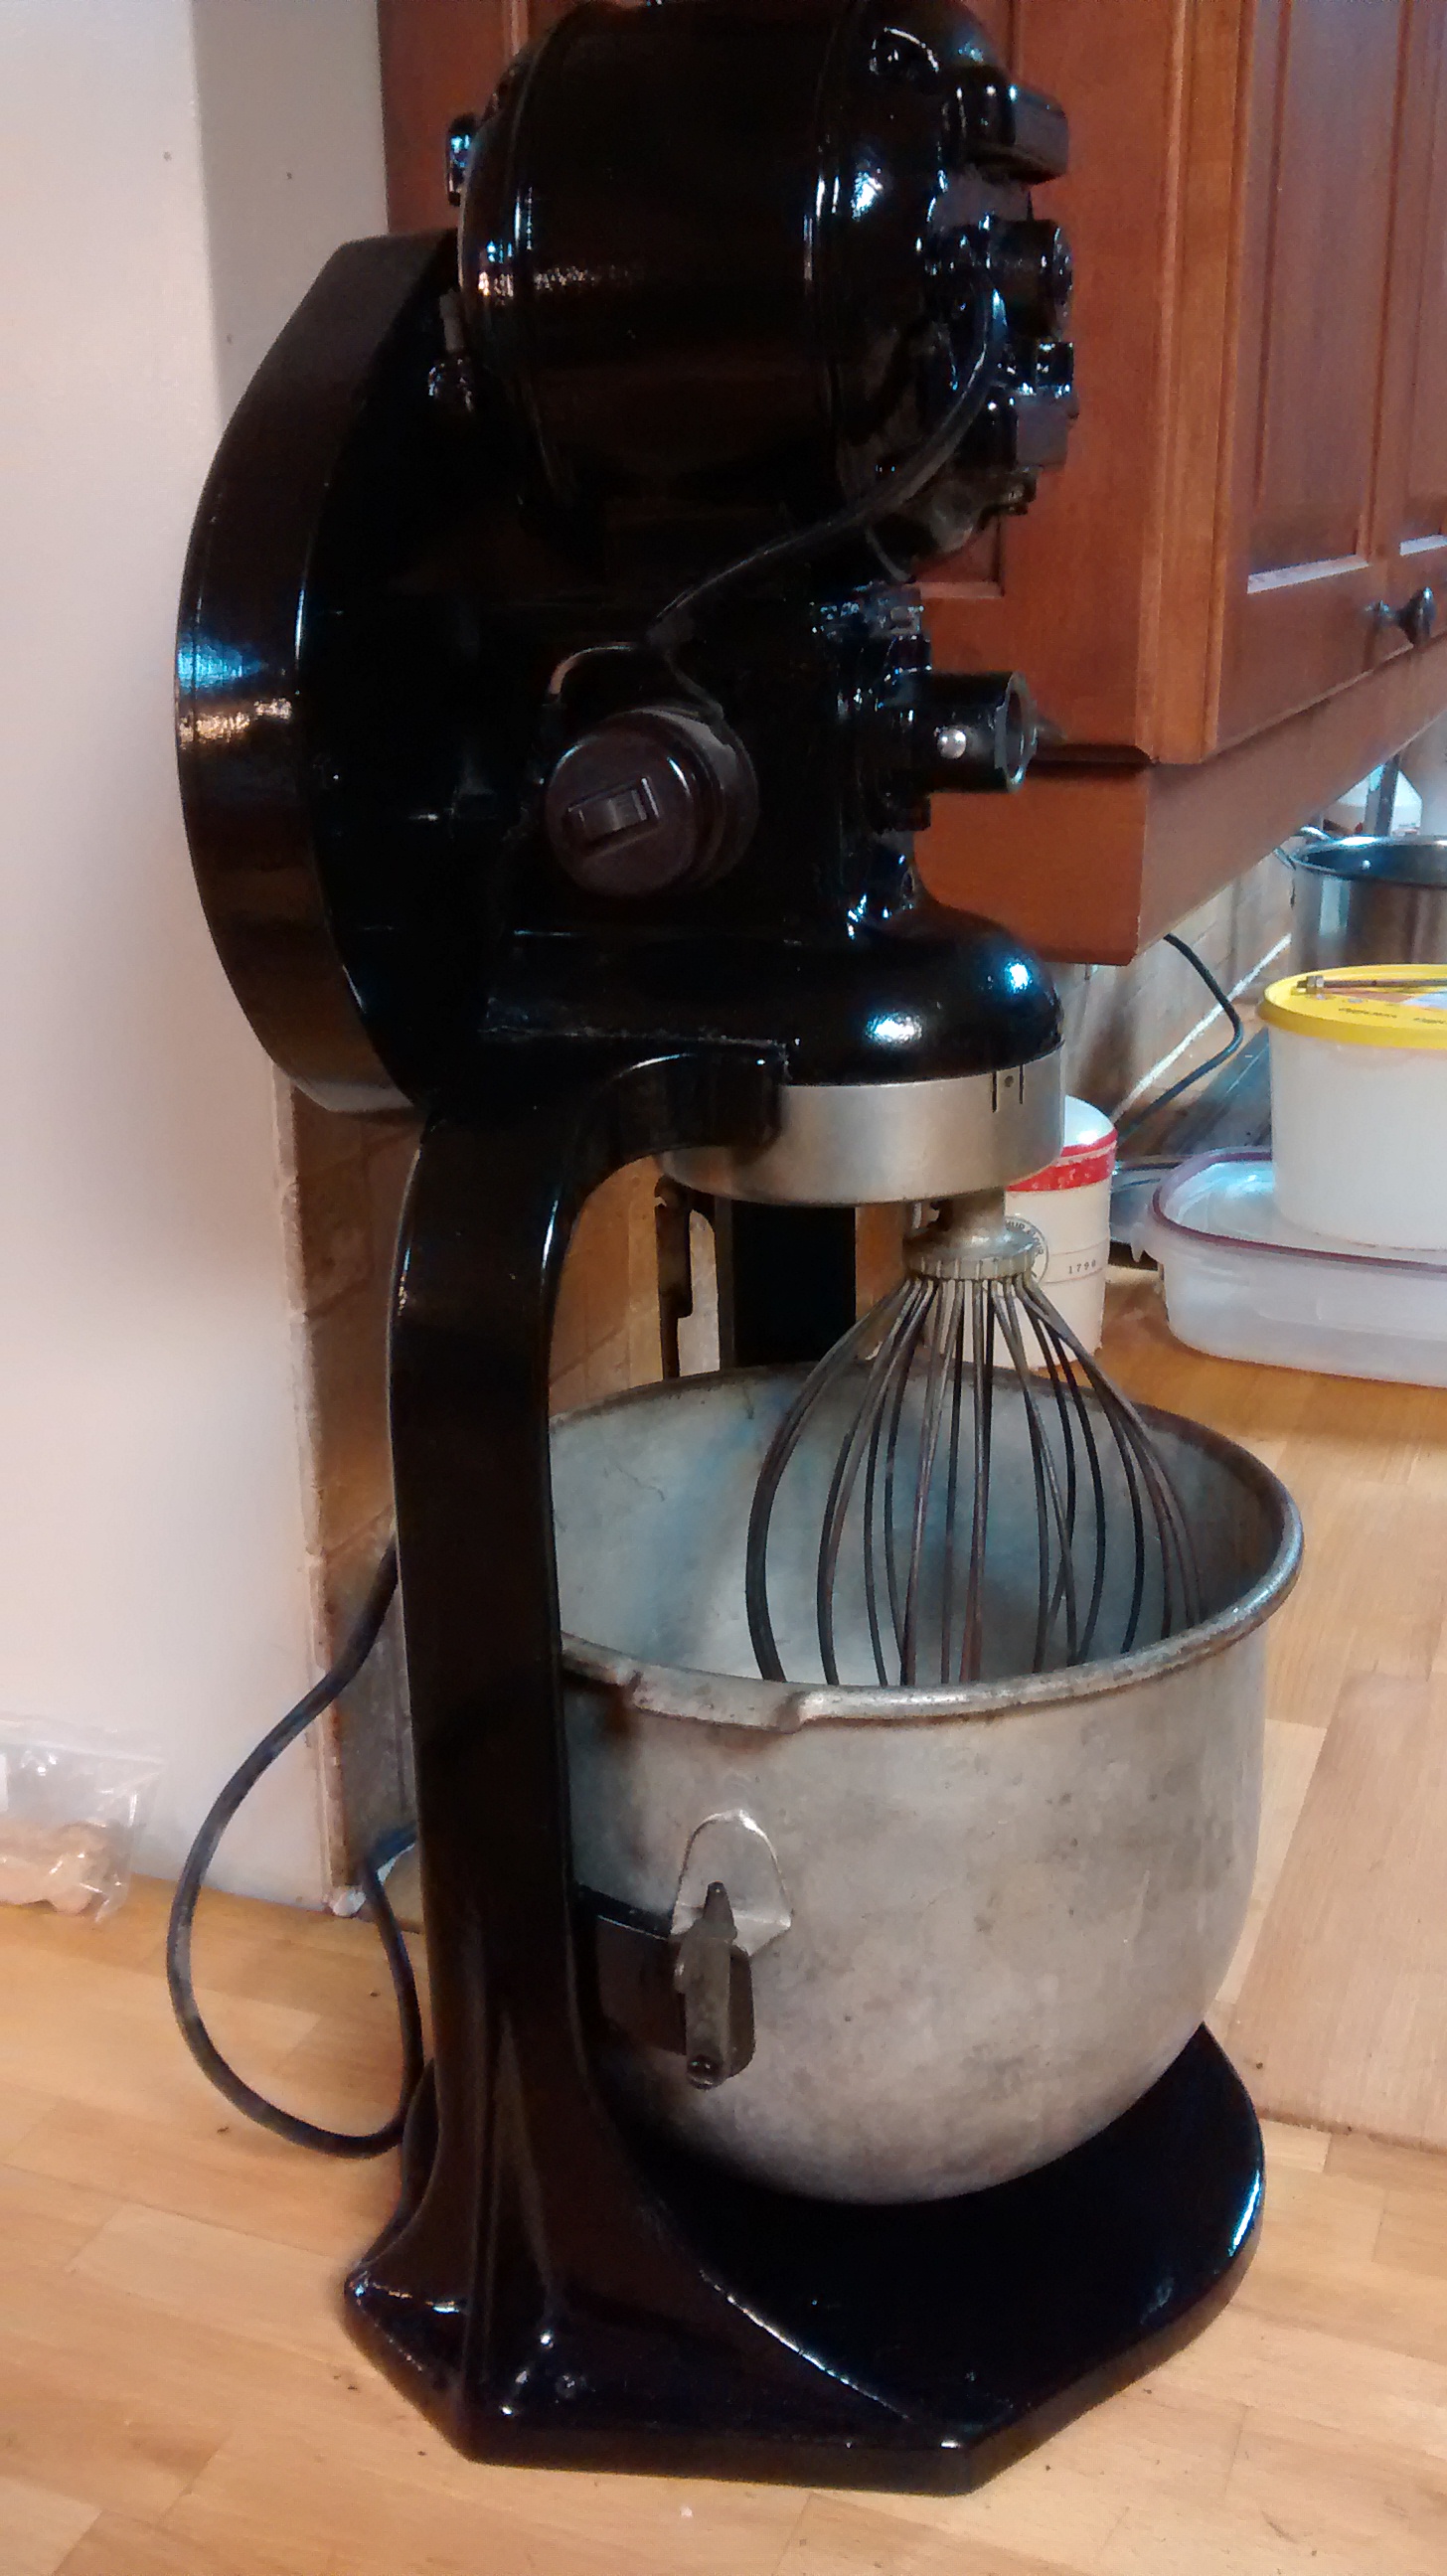
Vintage Hobart Stand Mixer refinished - side view.

Vintage Hobart Stand Mixer refinished – side view.

It’s tempting to rush the job – either by putting on the paint too thickly (which risks the paint dripping) or by not allow the paint time to harden before moving a piece – which risks having the soft paint job marred.  Either option is a false economy – take the time needed to do things right.

When the basecoat had dried I applied several very think coats of clear coat again from a spray can.  The clear coat really increases the luster of the underlying gloss black paint making the mixer really stand out.

Then I stripped the masking off and reassembled the mixer.  It looks great, and while I am a bit sad that I don’t have the original grey paint with pinstriping the black is much more to my taste – and this isn’t some antique that is there to just look good – I expect it to perform!  To that end it’s first task was to whip up some egg whites for meringue.  It did a great job.

Hobart C210  whisking egg whites

Hobart C210 whisking egg whites

As I whipped up the whites I was reminded of the first microwave our family got.  It was purchased at one of those liquidation events in a local sportsplex events – you know the ones that are in town for one weekend only and sell motorcycle helmets, leather jackets, underwear and home appliances not only in the same venue and display them with no apparent logic.  It was my father that purchased the microwave for my mother (along with a camera and a leather jacket for himself).  My mother scoffed at the purchase – what would she do with a microwave that she wasn’t already doing with her stove?  Her opinion was that it was both a silly and luxurious purchase.  That quickly changed with use – and as a family we went through the convert stage where loads of things had to be made in the microwave – even when it had become clear that the oven or stove top really did yield a superior product.  That ebbed with time – she is no longer trying to bake or make eggs in the microwave – but it has become a key appliance in her home as in nearly all other modern homes.  The microwave lasted nearly 30 years – periodically getting the micro switches on the door latches replaced when they would fail.  It was finally dismissed not so much due to an inability to perform and more because the decor had changed and a huge brown microwave no longer fitted where a smaller sleeker white unit available for less than a hundred dollars would.  Given that longevity and utility I’d say my parents made a pretty good investment that day, come to think of it my father is still wearing that leather jacket – though the camera is completely obsolete (and not even old enough to be a classic).

I have a feeling that this stand mixer is going to end up fulfilling the role that first microwave took in my mother’s kitchen.  While I’ve been content using a hand held mixer and danish whisk because that was what I had (and the danish whisk is such a great advancement over the wooden spoon I had previously employed) just beating the egg whites was a great introduction to how much I am going to enjoy this mixer.

By

Baking with Deer Tallow

A number of solid fats can be used for baking including lard, butter and shortening as well as tallow.  The first three can all be handled in a fairly consistent manner – chill and then cut into the flour mix.

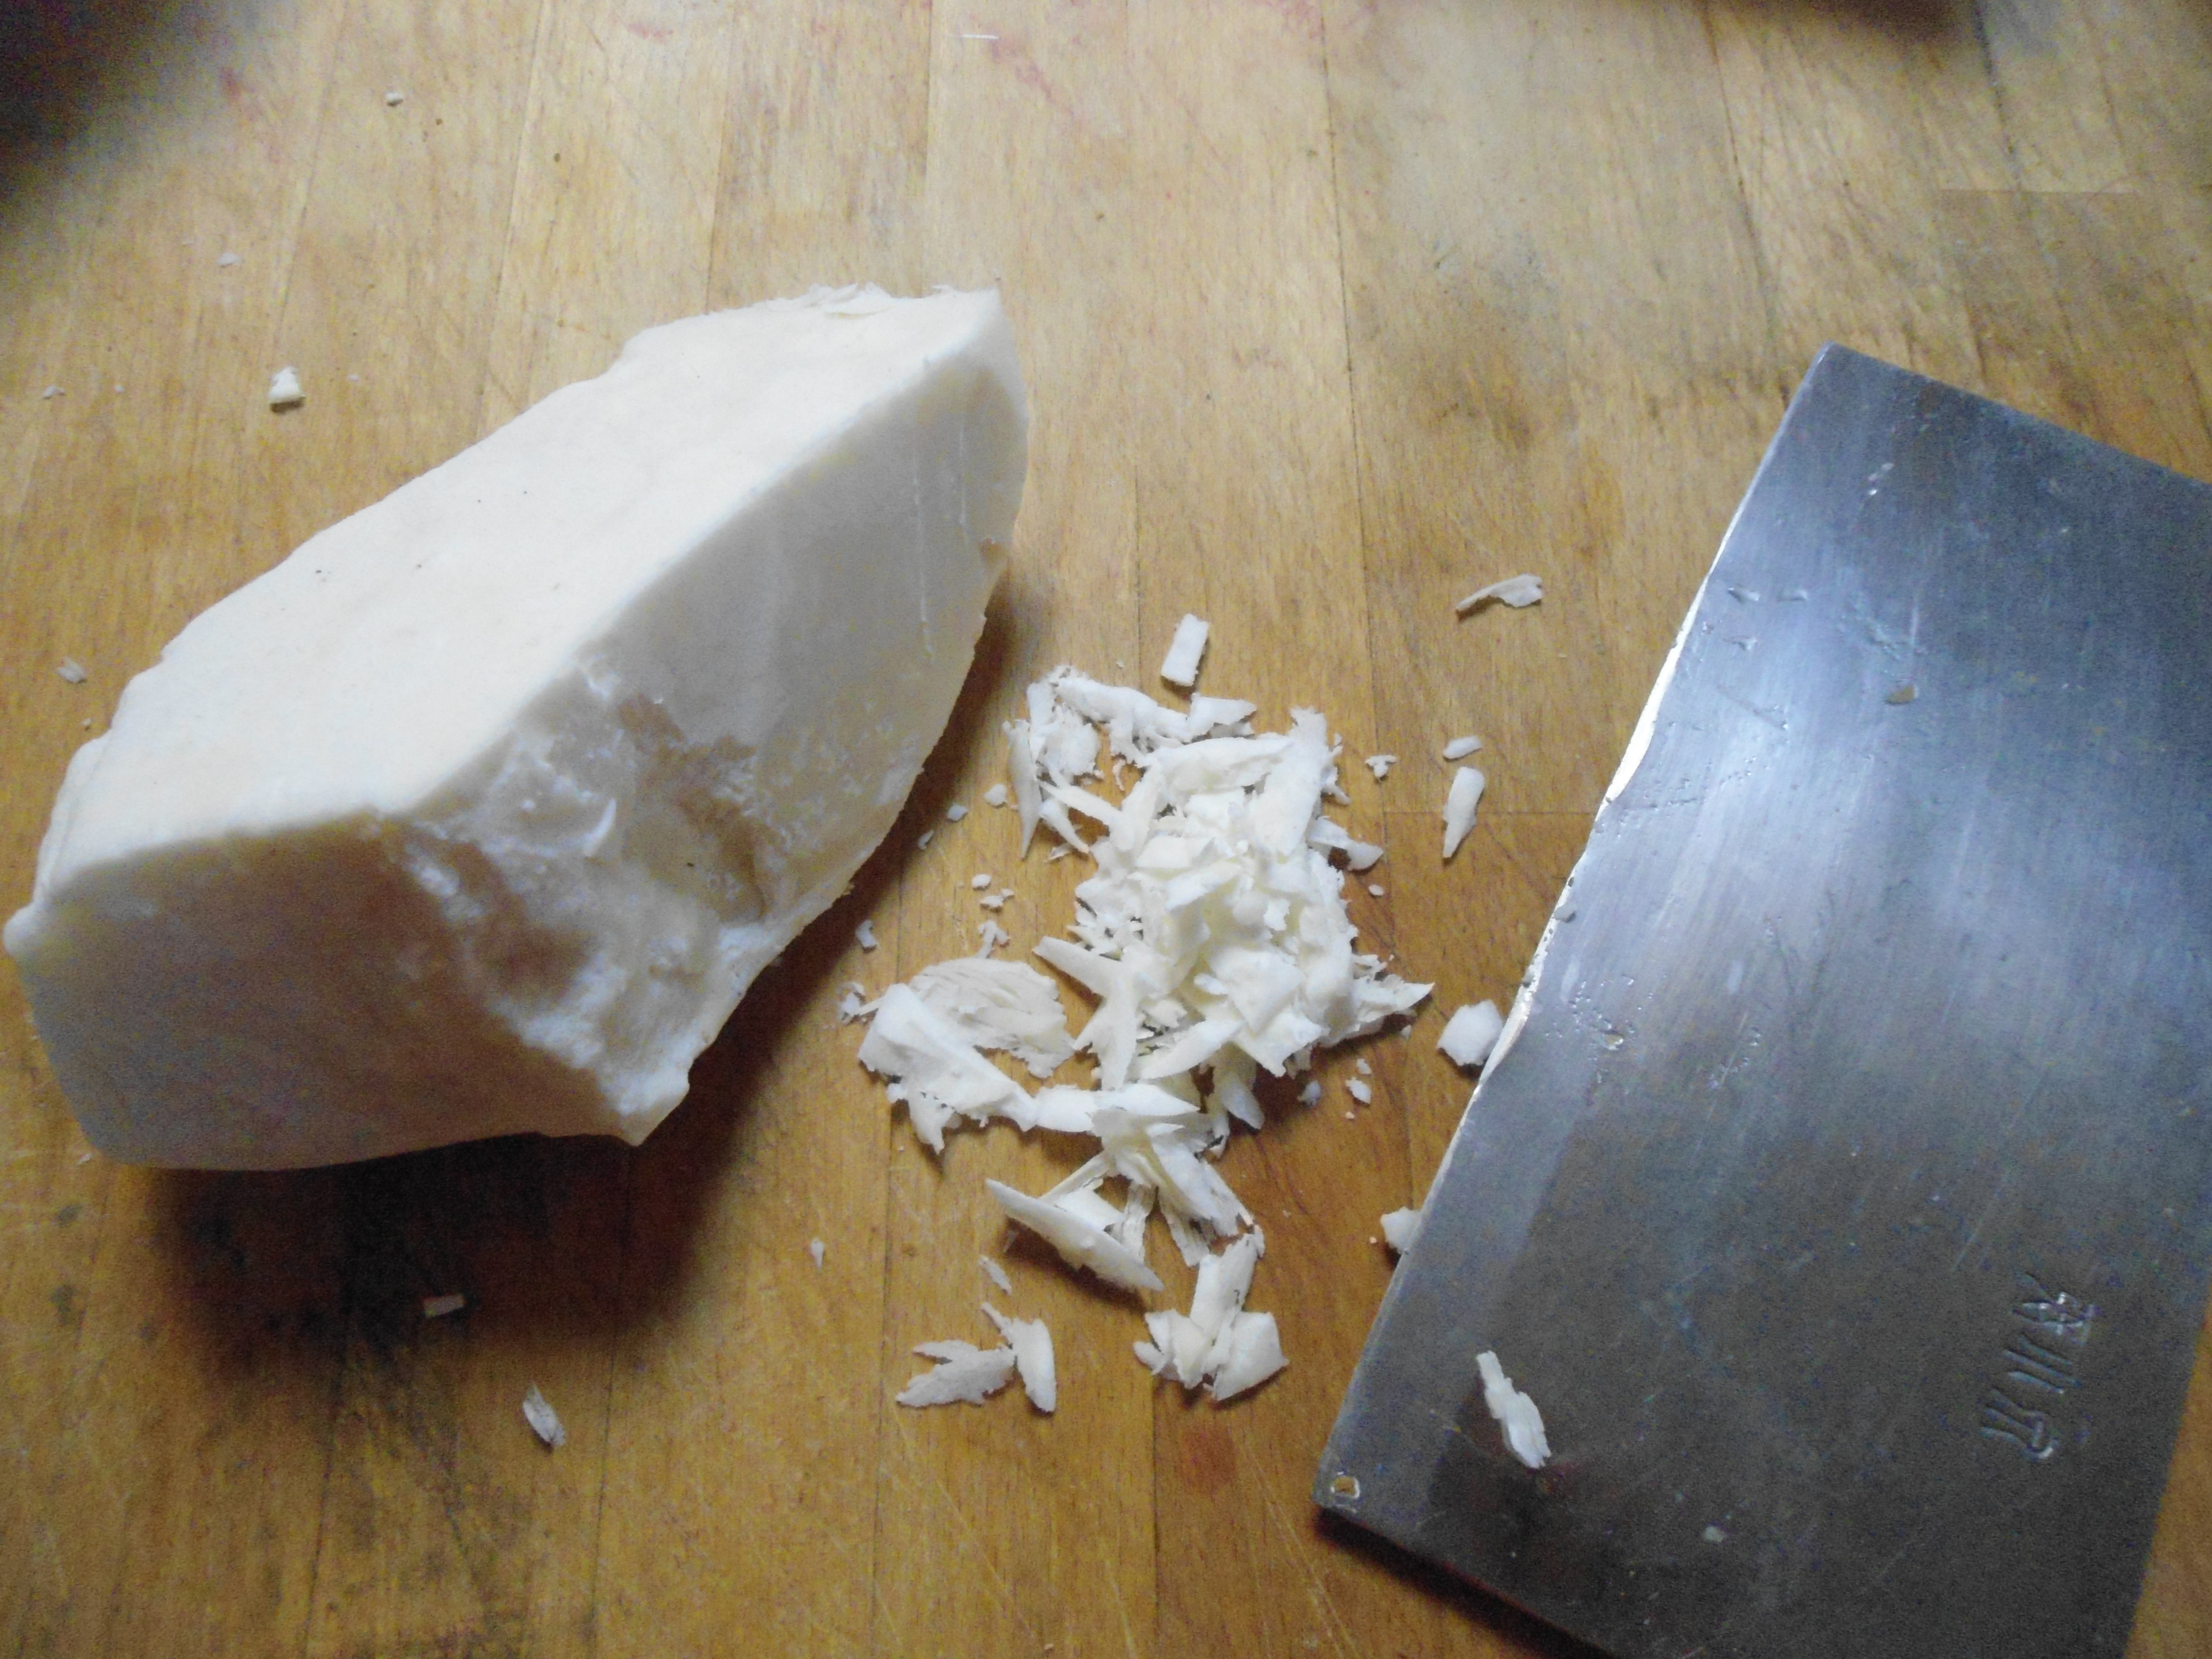
Pieces of tallow sliced off large block

Pieces of tallow sliced off large block

Tallow though doesn’t respond well to this treatment – it’s simply too hard to effectively break up in this way.

The good news is that by altering your handling strategy from the more conventional fats you can easily produce great baking with tallow.

As with the softer fats you’ll want to chill the tallow first.  Then instead of cutting it in the flour mix use a knife to shave the chunk of tallow into smaller pieces and then add these to the flour mix.  It’s that simple to make use of tallow rendered from either beef or deer in your home baking, and the results are excellent.

https://youtu.be/d2Tbc0oM3fg