
Tattler Reusable Canning Lids – Great But Tricky
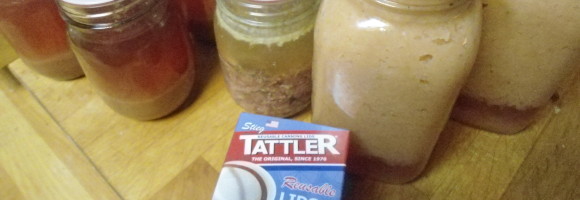

Tattler Reusable Canning Lids
I’ve been canning for years – small batches when I lived with my parents that then grew to be a bit larger when I got out on my own, and by a bit I mean I’d do things like I’d use my big outdoor gas burner and converted stainless steel keg to make 10 gallons of marmalade, jam, canned fruit or other preserves whenever some product became available for a great price. Enough to share with friends and family and last a couple of years.
All of that processing was boiling water bath canning and quite often I would reuses the rubber gasketed steel lids for several batches – until it appeared that they were deteriorating or they failed to seal. That worked very well for me and saw a minimum of new lids purchased every year.

Tattler lid and gasket on a jar of apple pectin
But then I picked up an All-American pressure canner – the really big one. It’s a great tool and has been great for making homemade low cost convenience foods. The value derived from being able to can up turkey stock alone has been huge.
However, there is no way that you can reuse a metal lid from a pressure canned jar. The vacuum is so great that inevitably they are bent enough that the risk of failure were they to be reused is great enough that it makes more sense to recycle them once the jar has been emptied. Doing that saw me needing to buy quite a few boxes of lids. That’s when I decided to try Tattler lids.
Tattler lids are basically a modern incarnation of the old glass lids with rubber gaskets – reusable time and again even after pressure canning.
So, what’s my verdict after about five years of using them? Great but there is definitely a learning curve associated with their use. They aren’t as easy to use as conventional metal lids – but once you get a feel for how to use them your failure to seal rate should be pretty close with either boiling water bath or pressure canning methods.
Check out the video for more on my preferred technique. But until you get the process down I’d suggest you continue to do batches with the majority of the jars topped with metal lids to reduce your frustration.

There is no mistaking a jar properly sealed with a tattler lid
Some folks have complained about the lack of ease in figuring out if the jar is sealed – sure you can’t push on the top of the lid and see if it has been sucked down but if you remove the ring you’ll see very quickly if the jar is sealed. Really the danger is if the jar looks to be sealed but isn’t – that isn’t a problem with the Tattler lids – even with boiling water bath canned one litre jars the vacuum is great enough to allow you to hold the lid and suspend the jar – there is no guessing needed. It is readily apparent if the jar is or isn’t sealed.
In terms of price – well I bought my first case of lids [and I have standardized with regular mouth masons jars] at regular price directly from Tattler and they do pay for themselves very quickly if pressure canning – less so if you are boiling water bath canning and can reuse the metal lids. After getting hooked on them Tattler had a crazy special where they were offering their lids for around half price – and that’s when I purchased a couple of bulk bags of lids and gaskets – so I expect that I’ll be using Tattler lids for the the rest of my canning life.
Now I can principally with the Tattler lids – the steel tops are reserved for jars which will be given away with no expectation of return.
If you probably should give Tattler lids a try – play around with them a bit and I am pretty sure you’ll end up hooked on them.