By

Building the Wood Fired Pizza Oven – Laying out the material

With a stack of flattened stainless steel sheets my next task was to figure out dimensions for the pizza oven.

I started with dimensions for the commercial units I liked which was 27″ x 27″ for the interior dimension.  Recall that as an insulated stainless steel unit there is both an inner and outer. shell.

Laying out the template for the wood fired pizza oven.

Laying out the template for the wood fired pizza oven.

The standard fire bricks I am using are 9″ x 4 1/2″.  So three bricks placed long way wide gives 27″  and six bricks deep makes 27″.

To get a handle on what I could accomplish using the materials at hand I labeled each piece of stainless steel and measured them up and then set about with a pencil and pad of paper figuring out designs.

The oven shape is simple enough- half circles.  The formula for the circumference of a circle is 2 x 3.14 x radius, so the half circle shape amounted to half that or 3.14 x radius.

So, long story short,  the material I had to work with dictated that the inner shell have a diameter of 27″ wide by 22 1/2″ deep.

The outer shell would have a radius 3″ greater to provide a gap for insulation between the inner and outer shell.

Getting ready to cut out the templates with the jigsaw

Getting ready to cut out the templates with the jigsaw

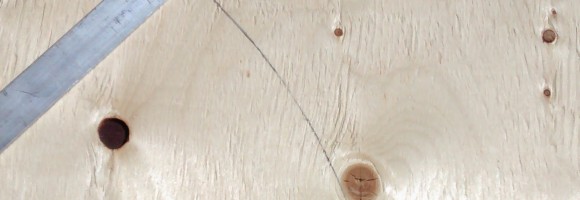
To make layout work a bit easier I grabbed a piece of 3/4″ thick plywood to make a master pattern with.  To draw the half circle I picked a piece of aluminum flat from my scrap pile and drilled a bunch of 1/8″ holes in it.  The first near the end would serve as the pivot point – when placed over a finishing nail tapped into the plywood – and other holes were drilled 13.5″ and 16.5″ further out from this point – the inner and outer curves respectively.

I used a jigsaw to cut the plywood curve out.  This then served as the template for laying out the back inner wall, the back outer wall, and the front curved piece.  One thing to take not of is that I marked out the initial curve described by the template but then added another inch to use to make tabs to bend over to provide additional structural support as well as give a place to spot weld the backs and fronts to the flat outer pieces…

Stay tuned for the next steps as we work towards a  really cool pizza oven made from stainless steel scrap.


By

A Homestead Wood Fired Pizza Oven – Getting the material ready

Taking the BBQ’s apart turned out to be pretty easy – for the most part.  The segments were joined by spot welds, rivets or screws and bolts.

Bending tabs flat with vice-grips

Bending tabs flat with vice-grips

I had been worried that the latter – the screws and bolts would create a problem, but for the most part the were made from stainless steel and disassembled easily enough.  A few of the screws were stubborn and needed to be ground off but those were the exception.

The rivets were handled by using the angle grinder to remove most of the head and then driving the remainder out.

Finally the spot welds were broken by progressively working a flat bladed screw driver into the gap until the weld broke.  In some cases this resulted in a bit of tearing of the material but for the most part a pretty clean break resulted.

The next challenge was to get the material back into flat sheets so that a proper inventory could be taken and choices made as to how to cut the pieces made.   To start I used vice grips to bend the tabs flat.  Then I simply stepped on them … and this did flatten them out enough to make further work on them more reasonable.

Minion 1 at work - safety glasses check... footwear?

Minion 1 at work – safety glasses check… footwear?

Minion 2 at work... pizza and fire - it's gonna be fun!

Minion 2 at work… pizza and fire – it’s gonna be fun!

I next attempted to finish the process with rubber mallets – assisted by the minions who are also hungry for wood fired pizza – that got us further along but not far enough.  I tried to follow up by using a ball peen hammer either directly or indirectly though a wood block… no dice.  Using the hammer directly left ugly marks and started to stretch the material – a counterproductive action, while using the wood block as the intermediary didn’t serve much more after we’d already used the mallets.

So then I hit up the 50 ton hydraulic press and it worked great.  I only used about 5 tons of force so using a jack under say a car might be an option for those without this advantage.  But hydraulic presses are reasonably priced and you certainly don’t need a 50 ton unit to accomplish this.  The sheets came out nice and flat, the seams were still visible but flat so layout should be easy after this.

Using the hydraulic press to reclaim stainless steel sheets

Using the hydraulic press to reclaim stainless steel sheets

So now I have a nice pile of flattened stainless steel sheets – mostly heavier gauge – some a bit light… some square, some rectangular and some oddities.  So my next step is to figure out what size of unit I have material enough to build… Stay tuned for more.